Table of Contents

Last updated Nov 01, 2023
The Ultimate Guide to Buying a Home Golf Simulator
Plan your build, find the best simulators and accessories, and bring the beauty of golf to your home.There‘s a build for every budget.
Written By: Zach Gollwitzer
Posted in: Golf Simulators
So you want to build a golf simulator...
You can imagine that perfect home golf experience, the fun times you‘re going to have with friends and family, the great practice you‘re going to get in this upcoming winter... But... You have NO IDEA where to start.
- What do you need to buy?
- How much will this cost?
- Do you have enough space?
- What are the best simulators?
In this guide, I‘ll show you EVERYTHING you need to buy, think about, and dream of to get your simulator setup just right, and ON BUDGET.
I wish I could tell you the EXACT setup you need and call it a day, but let‘s be real—this is likely the most expensive golf purchase you will ever make, and if you want to keep everyone in your household happy, you need to do some planning and research.
The last thing you want is a drained bank account and an eyesore front and center in your home that EVERYONE has to look at on a daily basis.
How much space do you need for a home golf simulator?
In general, the minimum space requirements for a basic, indoor home simulator build follows the 9x12x12 rule.
- 9 foot ceilings
- 12 feet wide
- 12 feet deep
For premium simulator builds (ceiling mounted and behind-the-ball), the minimum space requirements are:
- 10 foot ceilings
- 15 feet wide
- 20-25 feet deep
What is the optimal ceiling height for a golf simulator?
The minimum ceiling height required for an indoor simulator setup is 9 feet. This will allow most golfers (of average height) to swing a full driver in the space without hitting the ceiling.
That said, an optimal height is 10 feet or more as this guarantees that any golfer can swing a full driver, regardless of how tall they are.
Below is a breakdown of common ceiling heights and how they will affect your home golf simulator experience.
- Less than 8 feet: talk to a professional contractor to see if your ceiling can be increased or floor can be lowered. If not, you probably should not build a simulator in the space.
- 8-8.5 feet: not ideal. At 8 feet, you will be able to hit wedges and short irons. At 8.5 feet, you will be able to hit a few mid-irons, but it will still be tight.
- 9 feet: still not great, but very doable. With 9-foot ceilings, taller golfers may cut it close hitting 3-wood or driver, but will be able to comfortably hit all irons.
- 10 feet or more: this is the ideal minimum ceiling height and should allow you to comfortably swing every club in the bag, regardless of your height.
What width and depth of space is required for a home golf simulator?
The space required is dependent on the launch monitor that you purchase. There are 3 primary styles of launch monitors:
- Overhead launch monitors (e.g. Uneekor EYEXO)
- Launch monitors that sit on the ground, behind the ball (e.g. MEVO+)
- Launch monitors that sit on the ground, next to the ball (e.g. Foresight GC3)
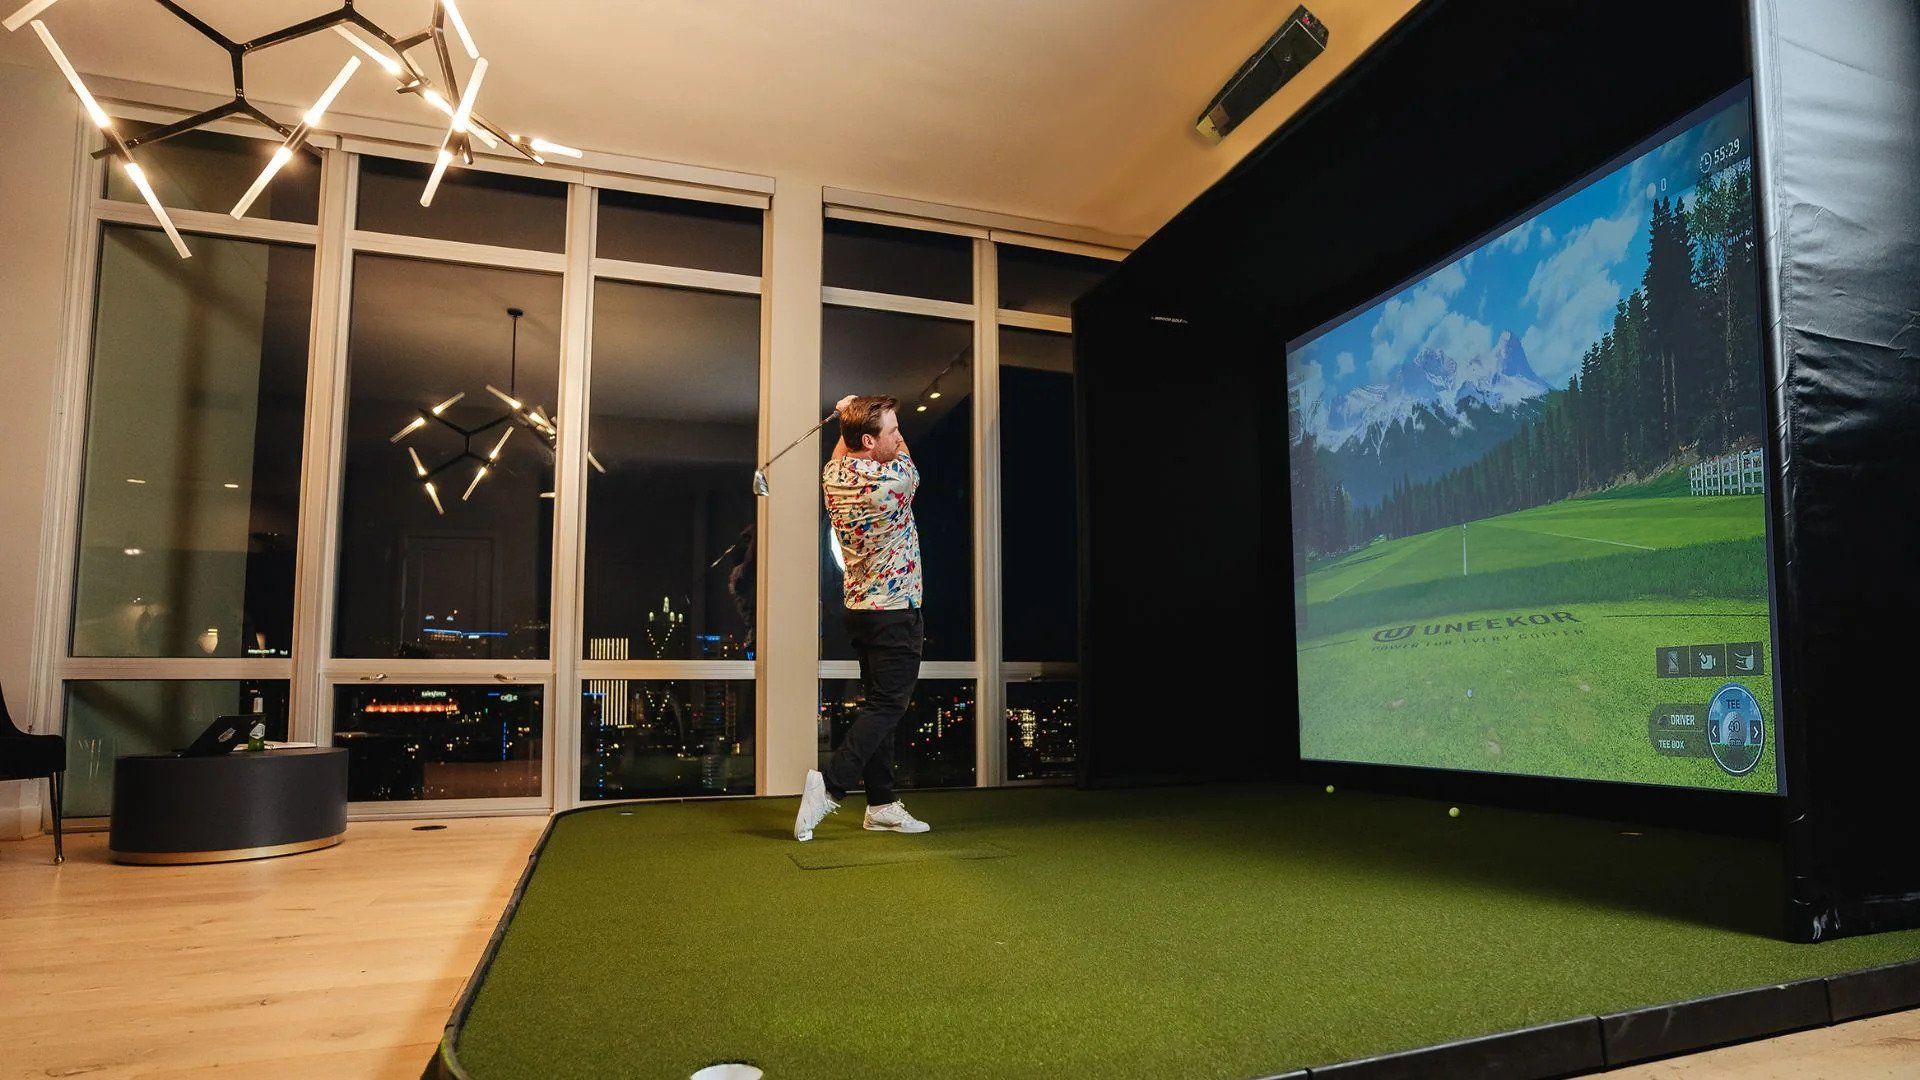
Overhead, ceiling-mounted golf simulators
If you are purchasing an overhead launch monitor such as the Uneekor EYEXO, you will need to meet the following space requirements:
- Minimum of 10 foot ceilings: since you are mounting on the ceiling, you need some clearance so your club doesn‘t come crashing into the launch monitor and break it!
- Minimum of 15 feet wide: since the overhead mount will be directly over the ball and centered on the mat, you will need at least 15 feet to ensure both lefties and righties can make full swings with the driver.
See the diagrams below for the overhead simulator setup.
Down the line, ceiling-mounted simulator setup:
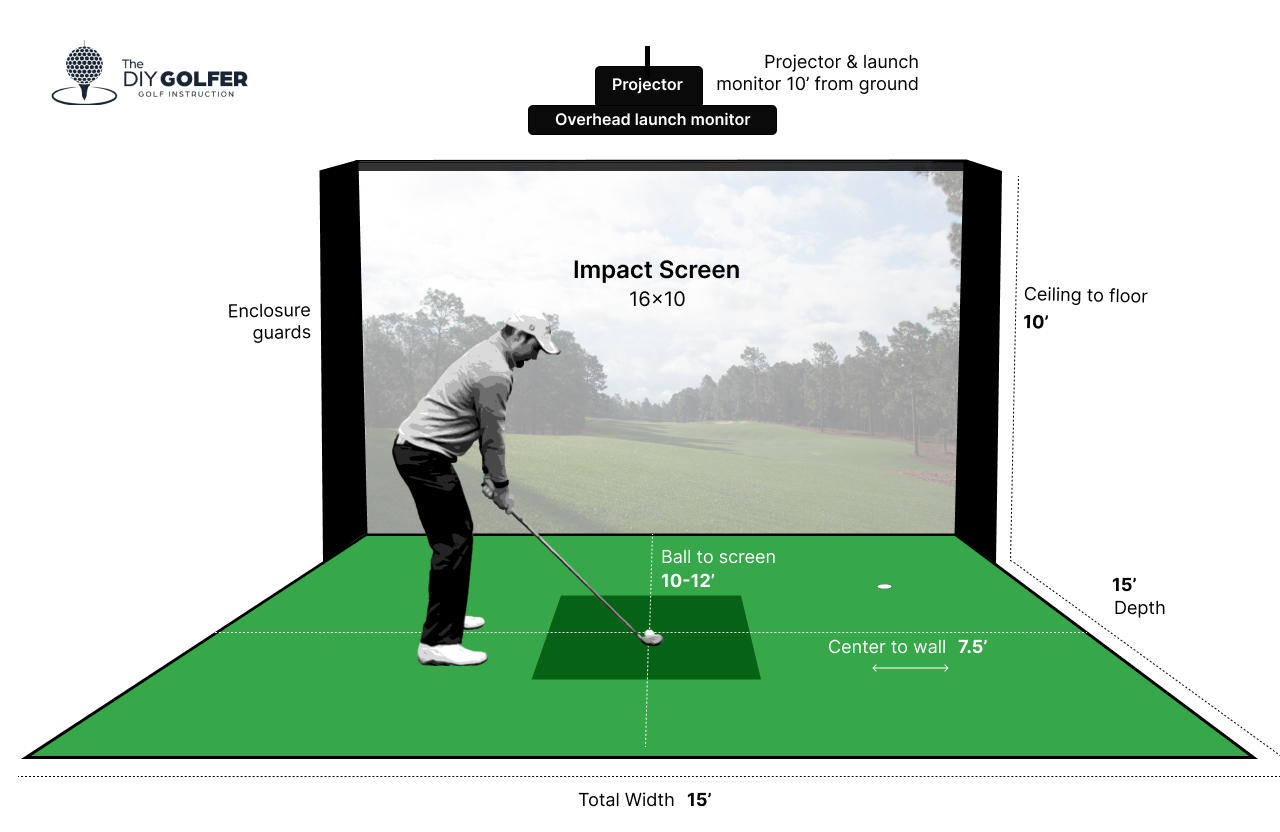
Face-on, ceiling-mounted simulator setup:
Pros and cons to overhead, ceiling mounted setups
Pros
- Best overall experience
- Righties and lefties can play at the same time without adjusting the setup
Cons
- Most expensive
- Requires the most space
- Likely requires a professional to install
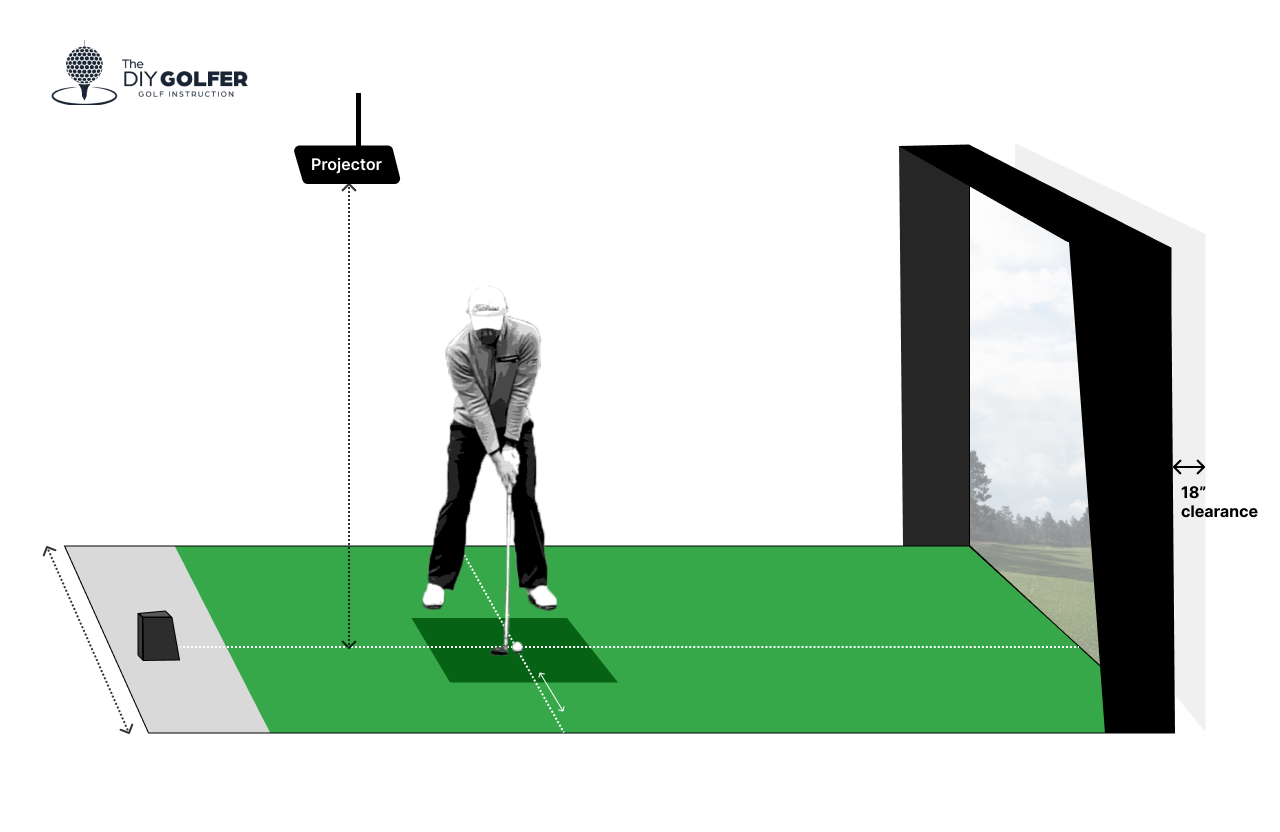
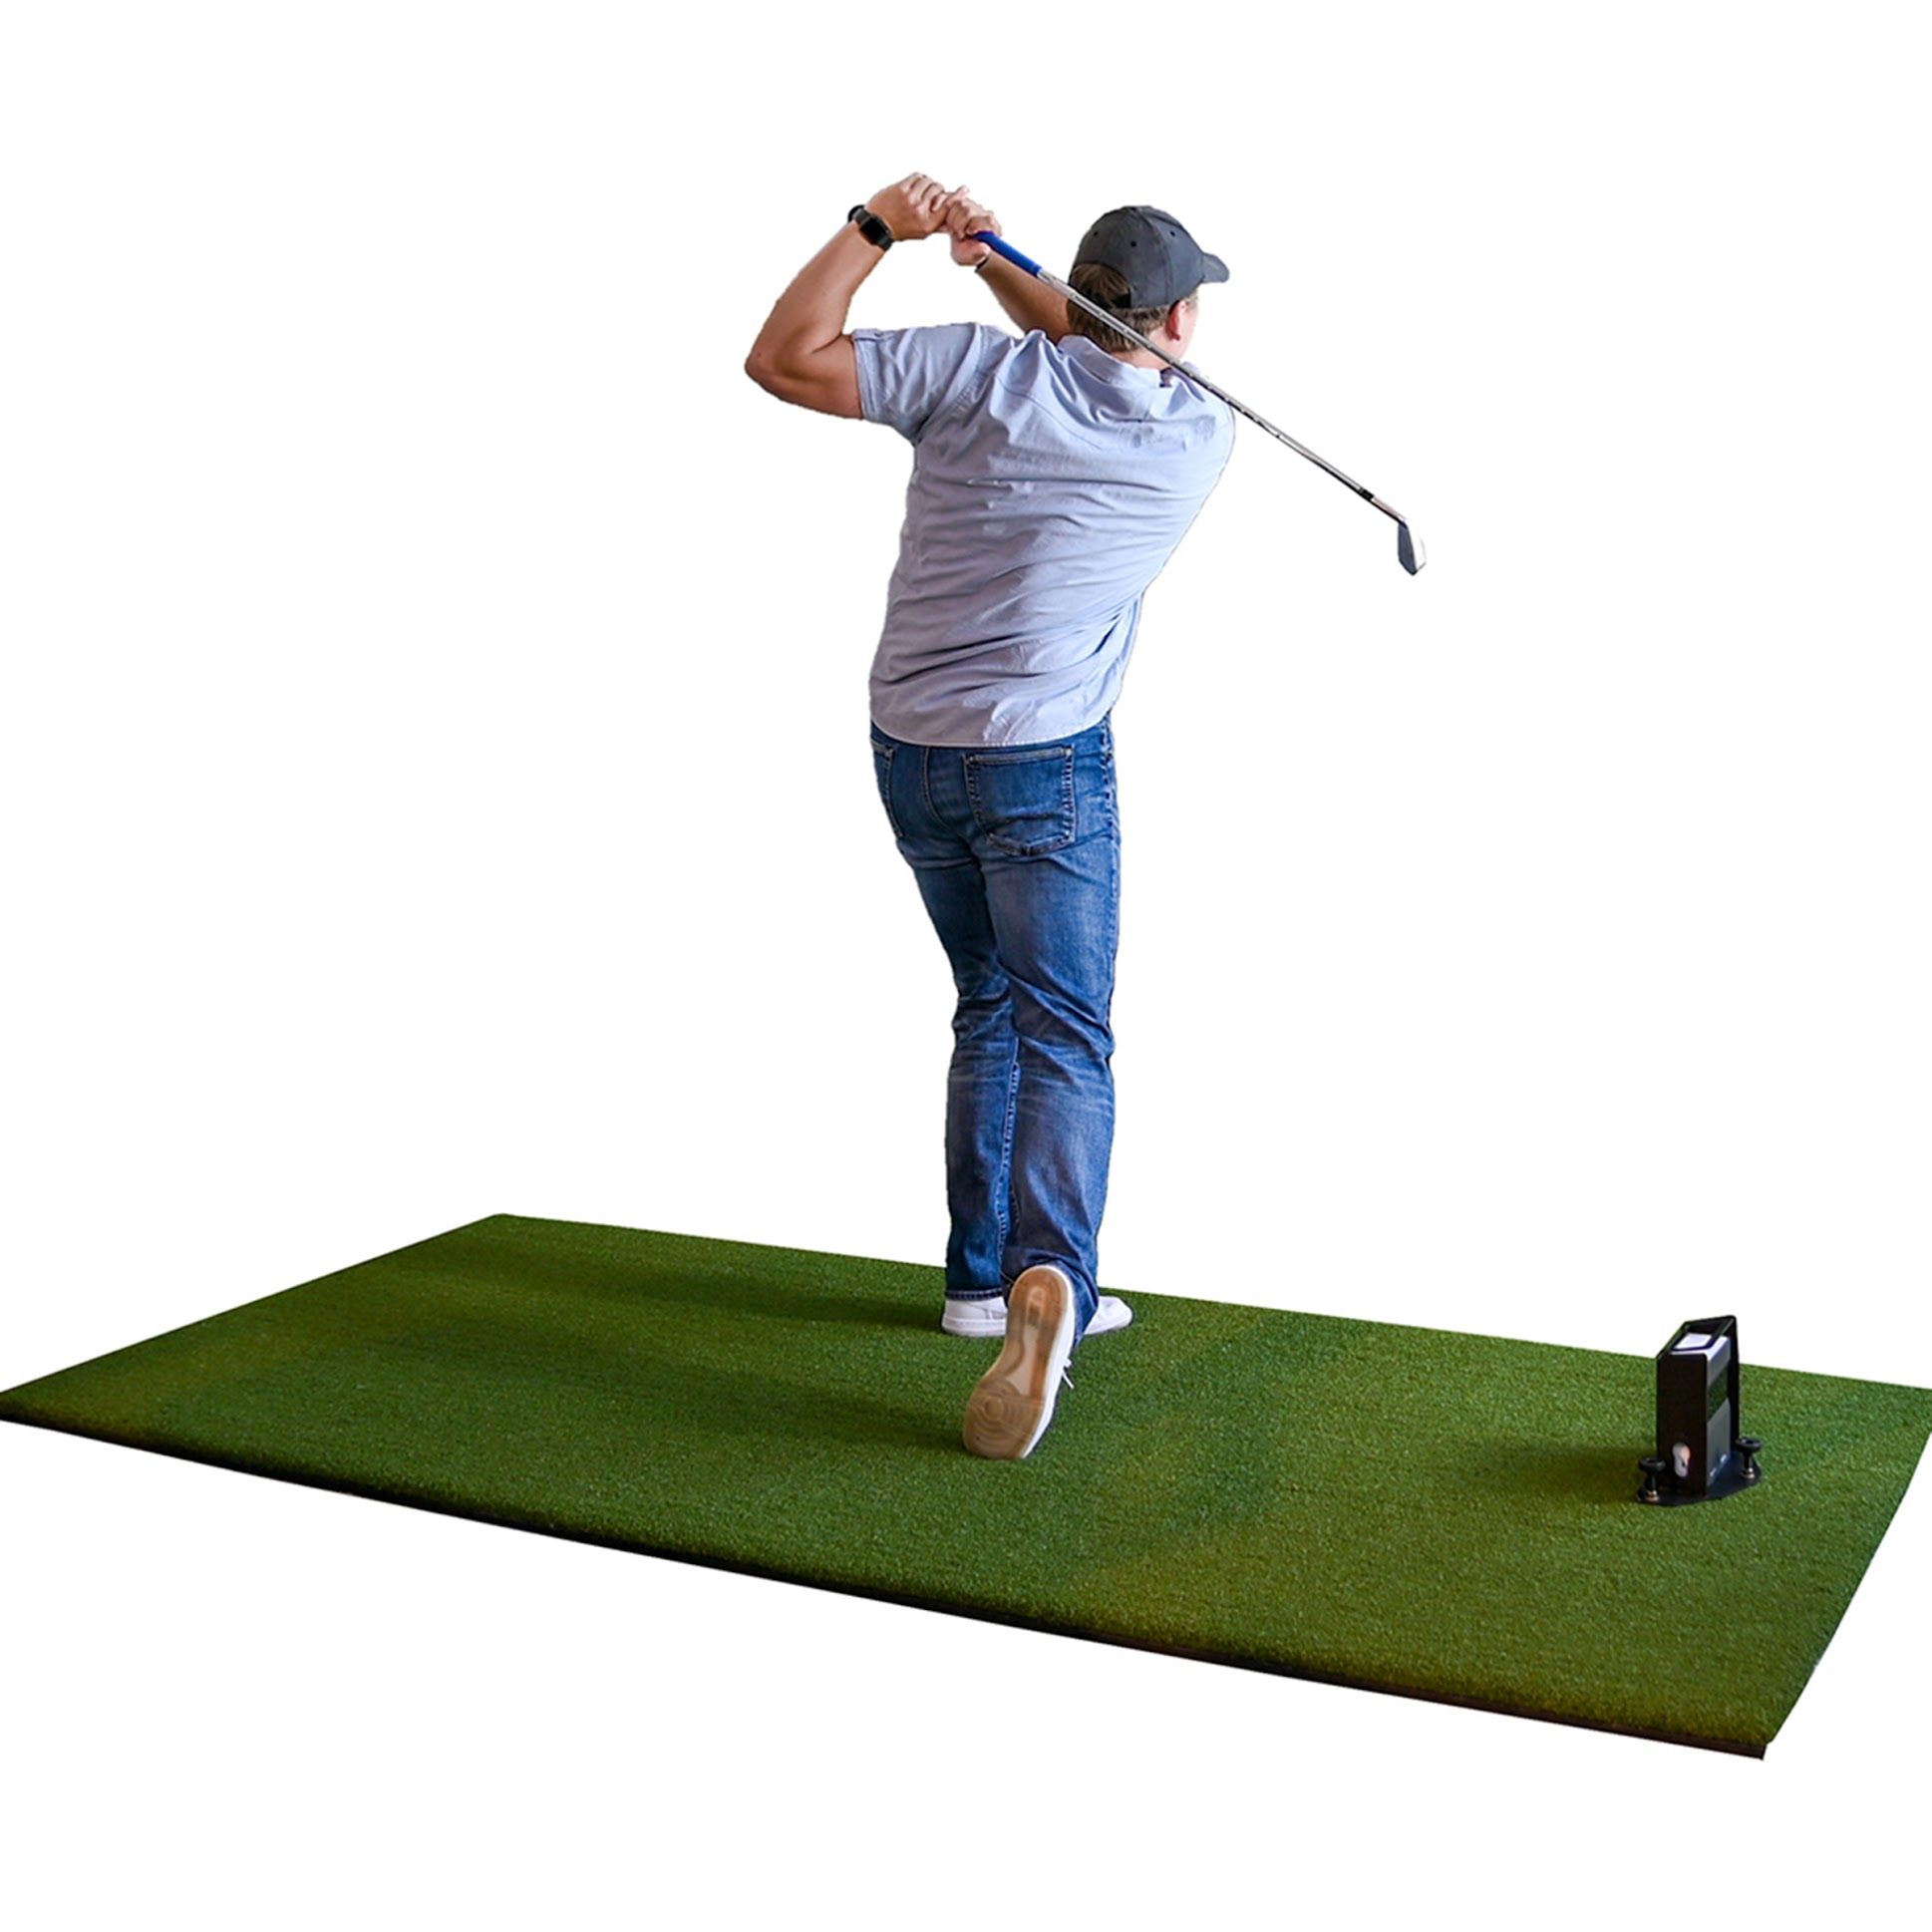
Side-mounted golf simulators
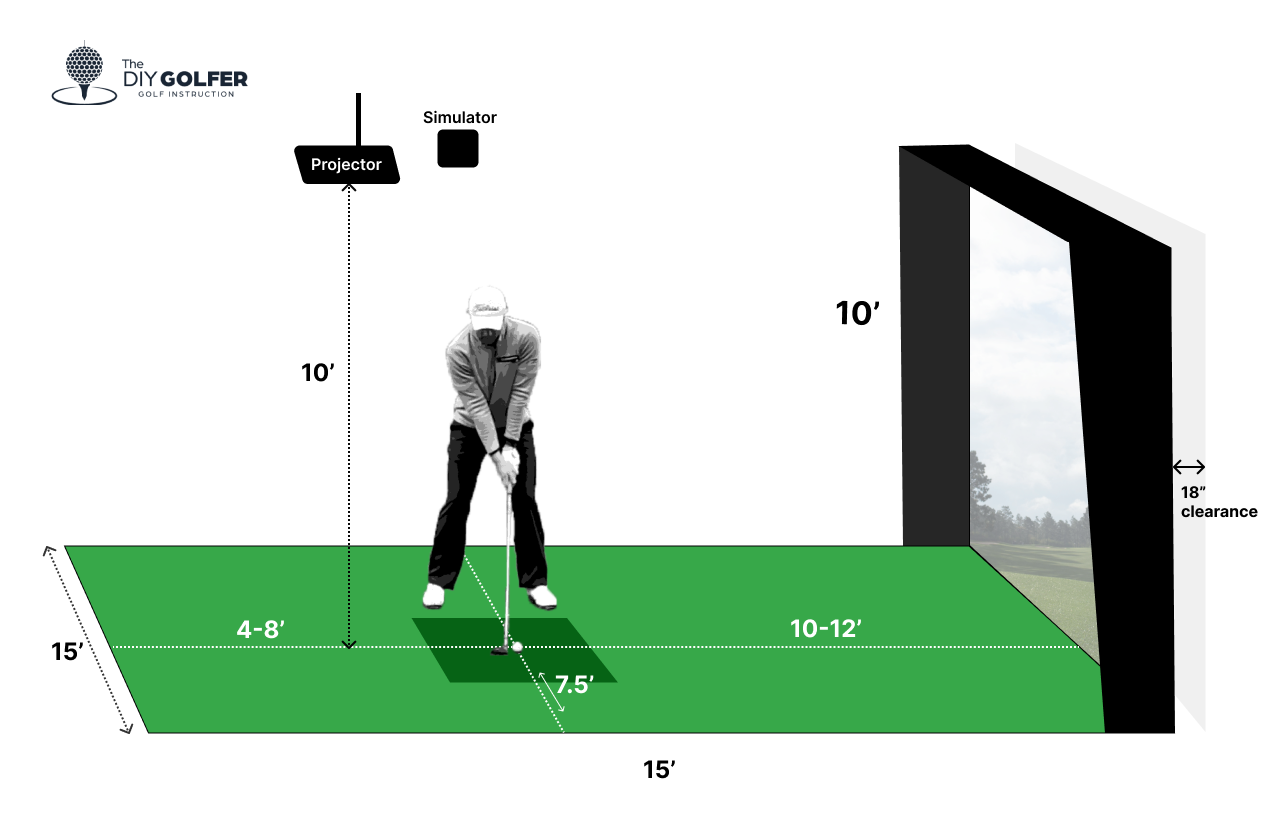
If you are purchasing a simulator like the Foresight GC3 that sits next to the golf ball, you will need to meet the following space requirements:
- Minimum of 9-10 foot ceilings: if you plan on adding a projector, you will need 10 feet, otherwise, 9 feet.
- 12 feet wide, 12 feet deep these simulators are mounted on one side of the mat, so you won‘t need as much depth and width.
See the diagrams below for the side-mounted simulator setup.
Down the line, side-mounted simulator setup:
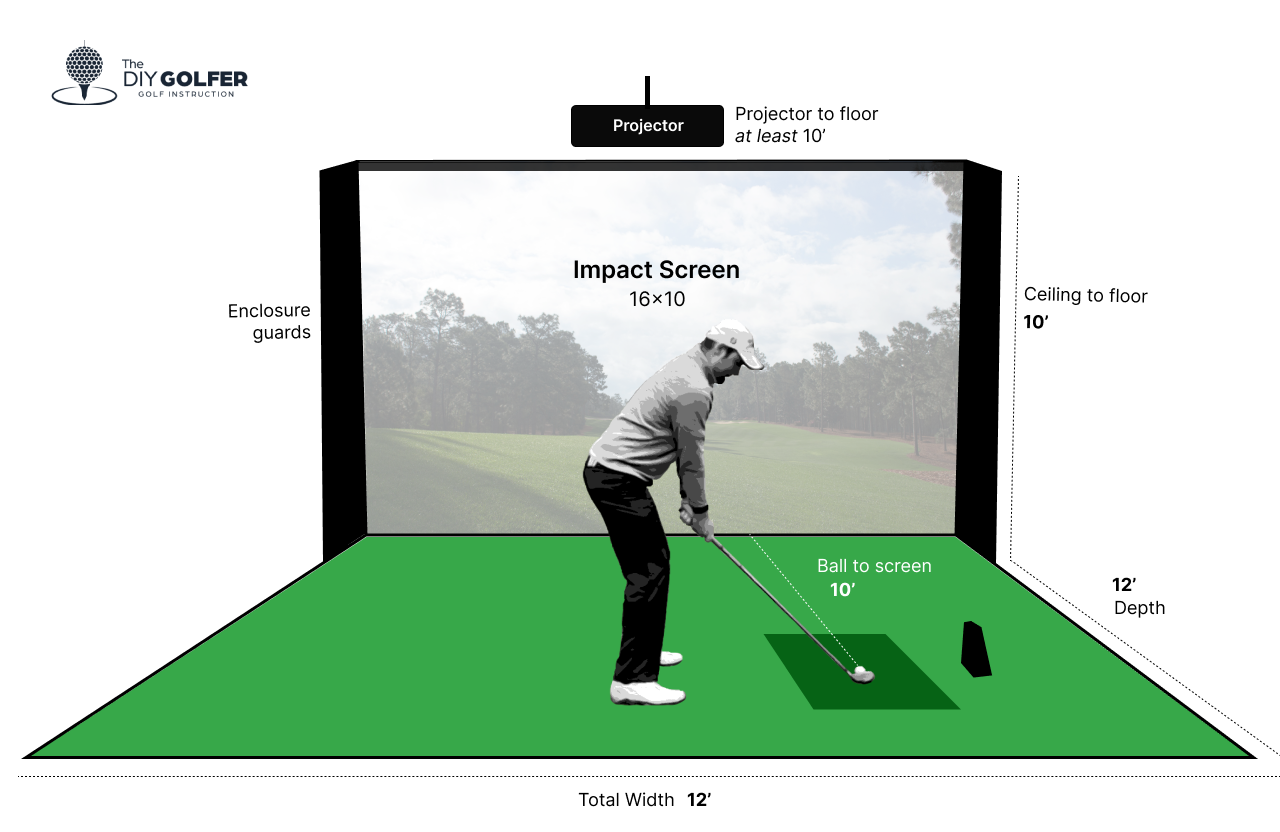
Face on, side-mounted simulator setup:
Pros and cons to side-mounted setups
Pros
- Best for small spaces
- Affordable
- Can be portable
Cons
- If lefties and righties are both playing, the launch monitor will need to be moved each time
Rear-mounted golf simulators
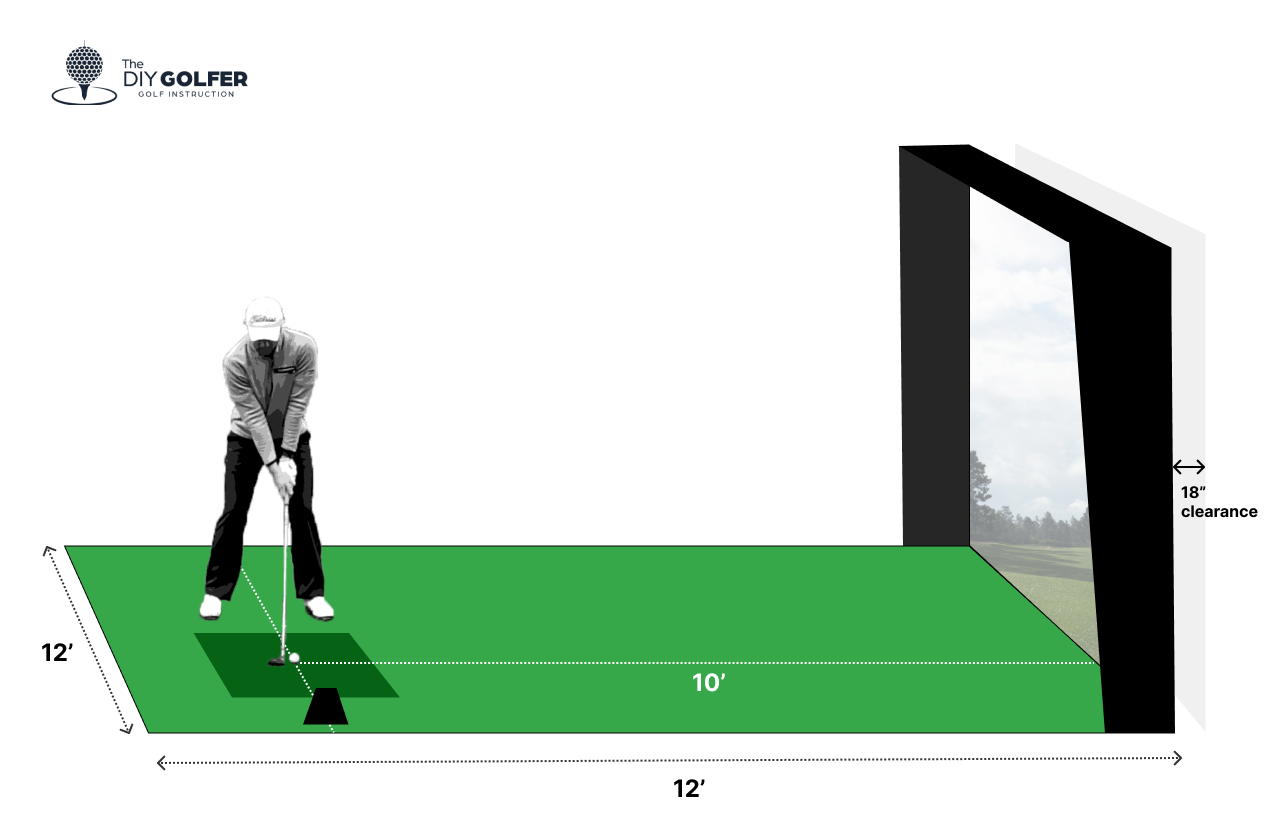
If you are purchasing a golf simulator that sits behind the ball such as a Trackman, MEVO+, or some Flightscope models, you will need to meet the following space requirements:
- Minimum of 9-10 foot ceilings: if you plan on adding a projector, you will need 10 feet, otherwise, 9 feet.
- Minimum of 15 feet wide: since the launch monitor is behind the ball and centered to the mat, you will need at least 7.5 feet on either side of the ball to accomodate both lefties and righties.
- Minimum of 20-25 feet deep: since the launch monitor is behind the ball, you will need at least 20-25 feet of depth to accomodate 10-12 feet from the screen to the ball followed by 6-8 feet between the ball and the launch monitor.
See the diagrams below for the rear-mounted simulator setup.
Down the line, rear-mounted simulator setup:
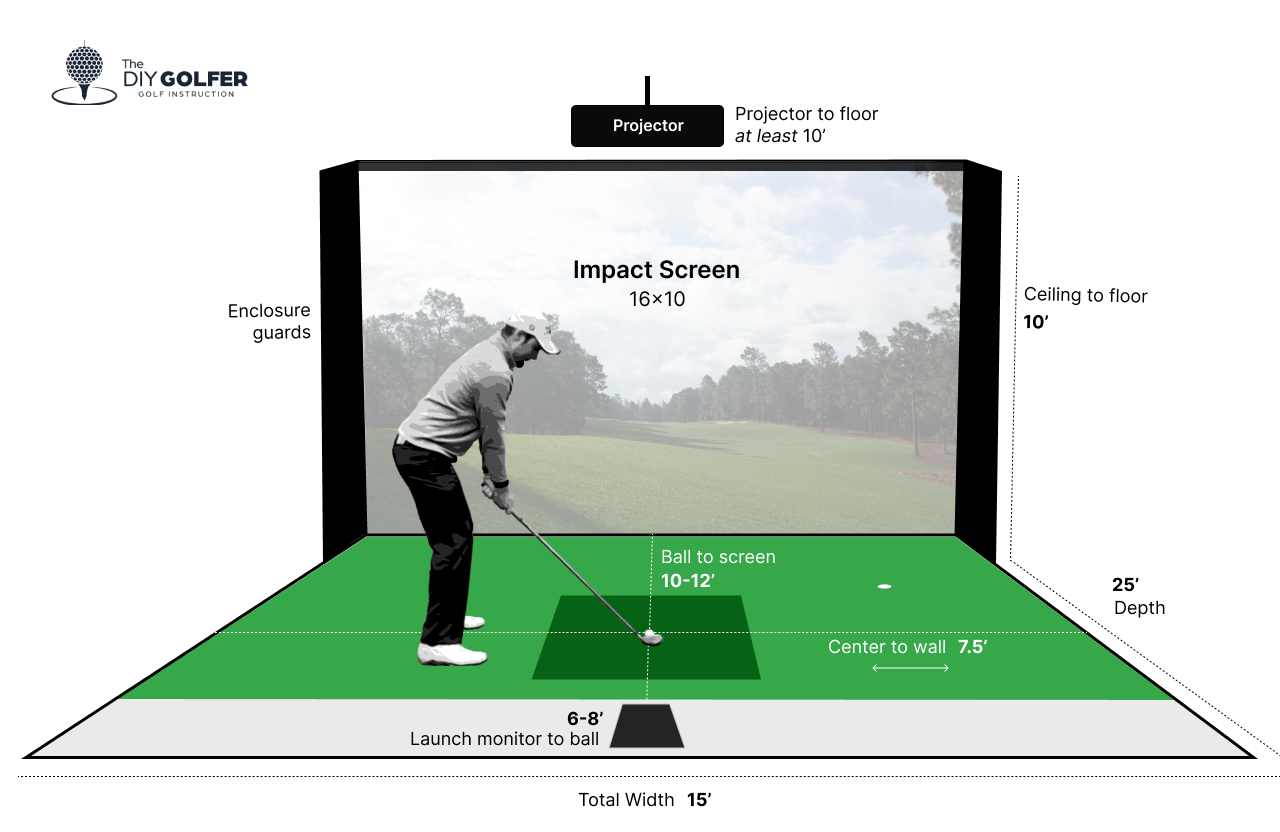
Face on, ceiling-mounted simulator setup:
Pros and cons to rear-mounted setups
Pros
- Includes highly accurate models such as Trackman
- Can be portable
Cons
- Requires the most space
What materials do you need to build your home golf simulator?
Where can I buy home golf simulators and accessories?
While there are many online retailers that sell launch monitors and accessories, my favorites are:
- Carl‘s Place - probably the most well-known in the indoor golf simulator retail game, Carl‘s place has almost everything you would ever need in one spot. If you‘ve got the budget for it, I highly recommend purchasing your supplies here.
- Indoor Golf Shop - while a bit newer, Indoor Golf Shop has a great selection of launch monitors, mats, and accessories and is another excellent option if you have the budget to purchase more premium golf simulator materials.
- Amazon - while I would not recommend purchasing from Amazon for more expensive builds, it can be a great place to pick up budget-friendly launch monitors, nets, projectors, and mats.
For a premium home golf simulator build, here are all the materials you can expect to purchase. Simpler builds do not require all of these materials.
Net / Impact Screen / Enclosure
The most important part of any home golf simulator is the net, impact screen, or full enclosure that will stop the golf ball. The last thing you want is a bunch of holes in the wall from hitting golf balls, so it is important to purchase the right setup for your space.
Basic net
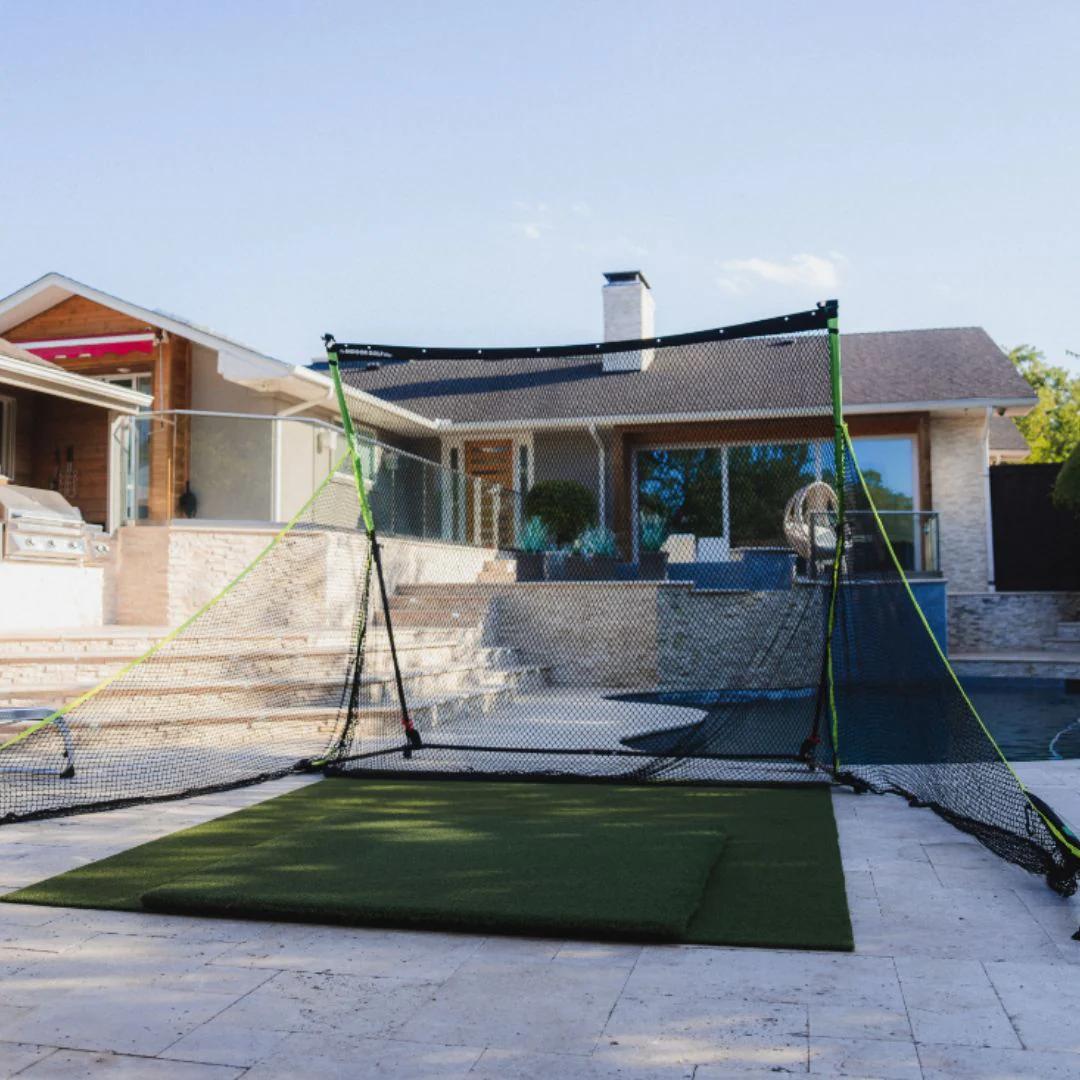
A net can be great for simple DIY builds and also great for outdoor builds.
Impact screen
An impact screen is a screen that is designed not only to stop golf balls, but also to display the simulator software. If you want a great simulator experience with high-quality graphics, making an investment in a great impact screen is worth the money.

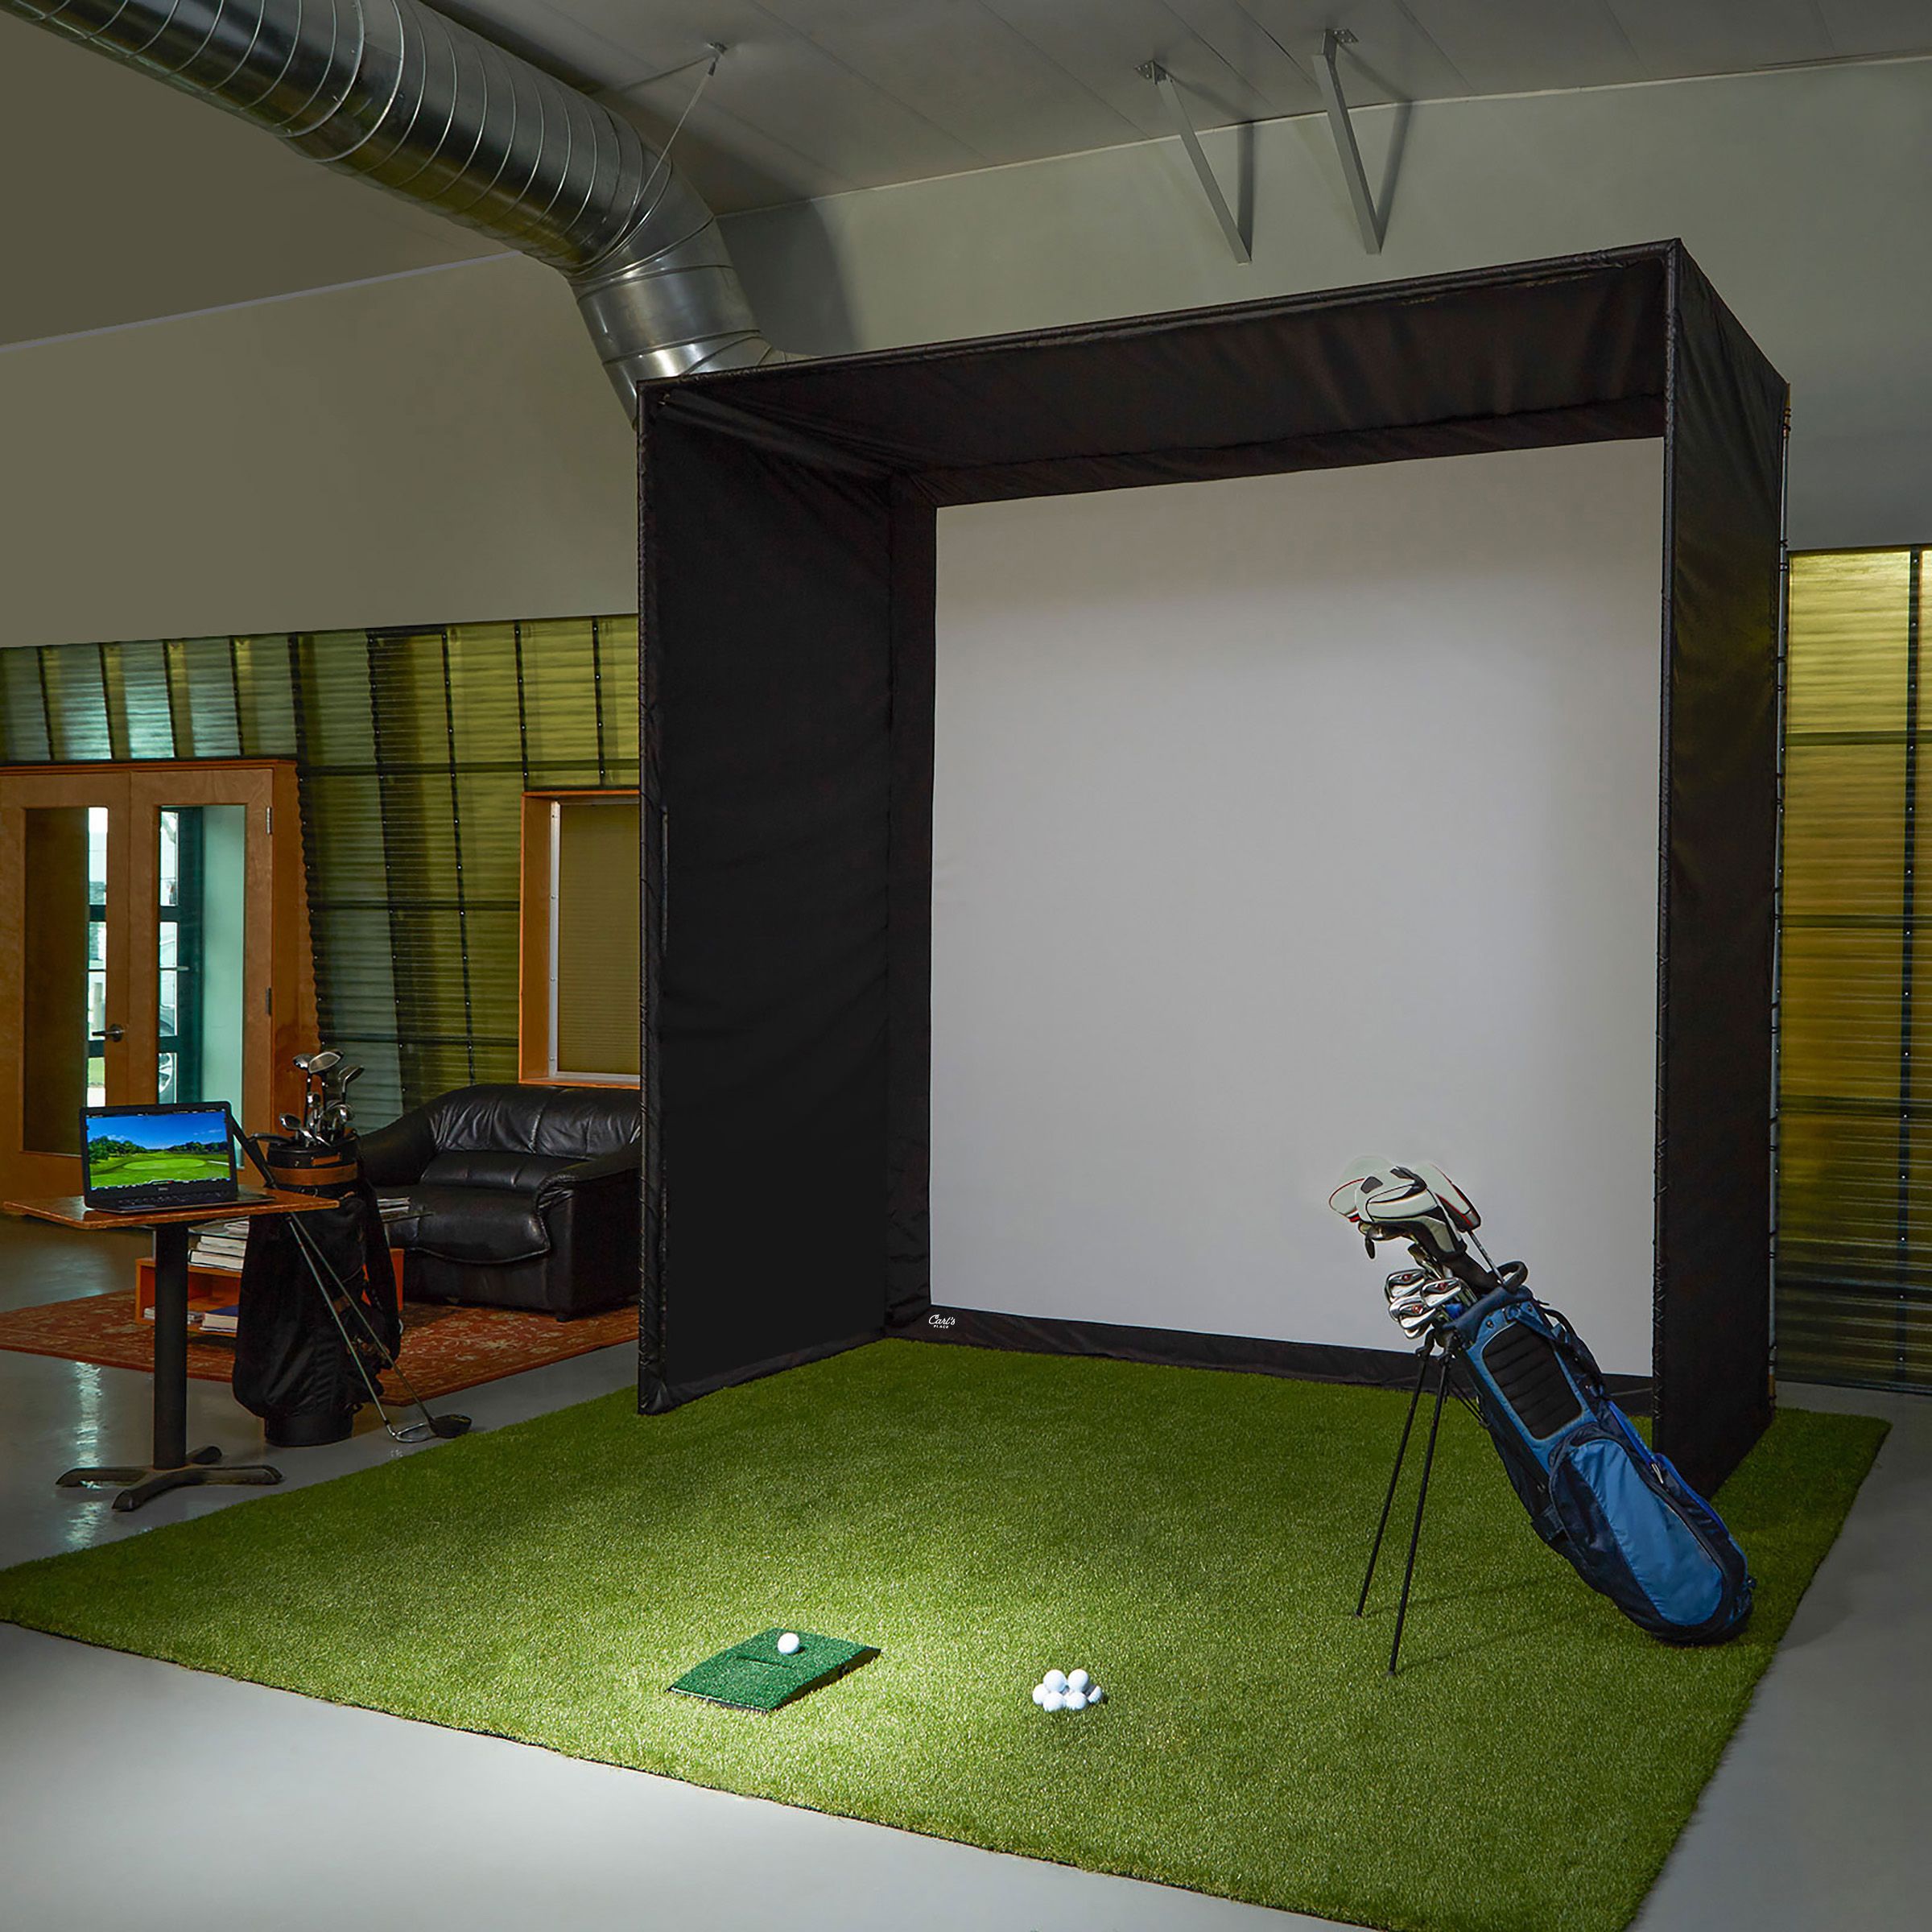
Enclosures
Many vendors sell pre-built enclosures that include an impact screen and some side rails to stop errant golf shots. For the full simulator experience, you will likely want to invest in one of these enclosures.
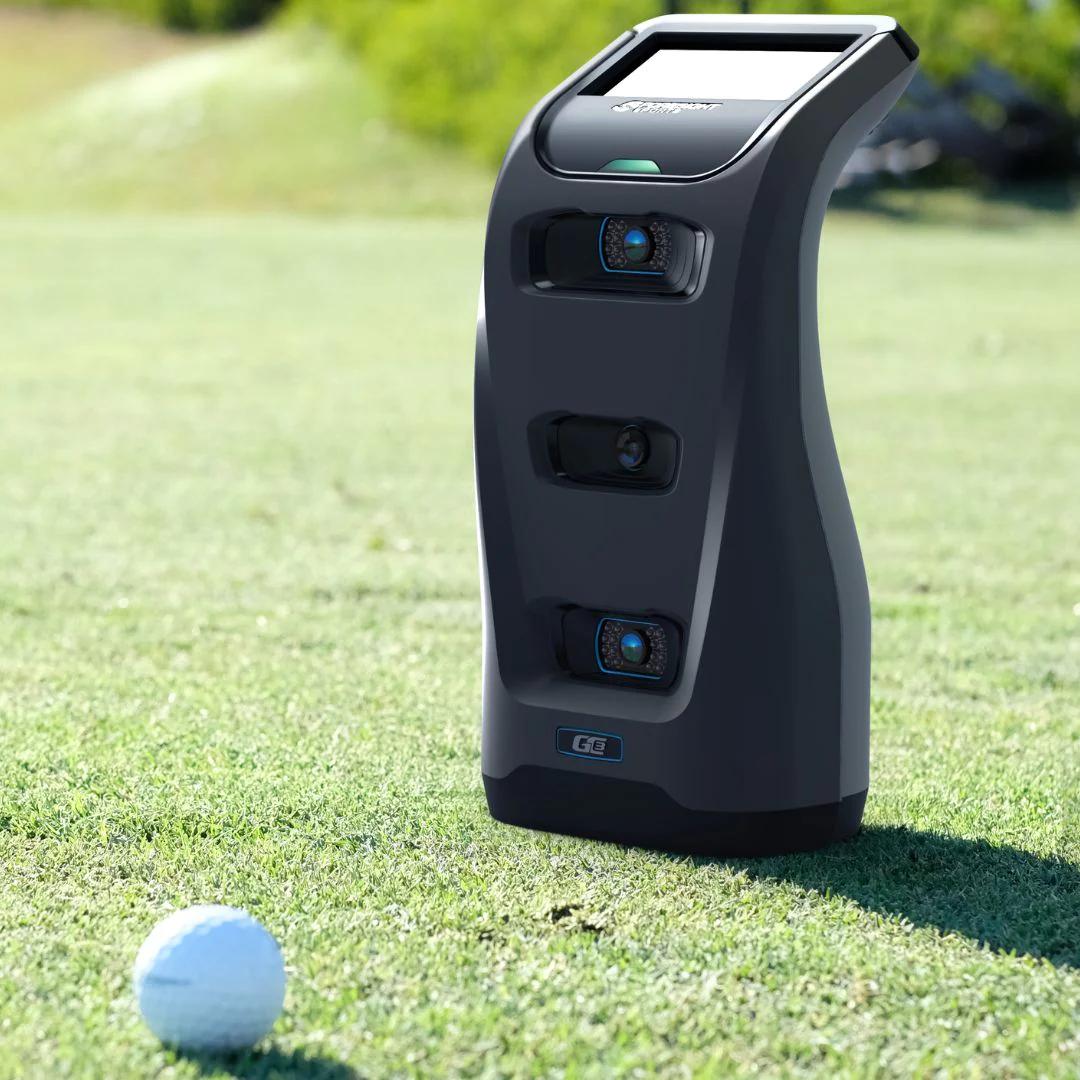
Launch monitor
The “simulator“, or more formally the “launch monitor“ is usually the most expensive part of your build. While there are options under $1,000, if you are looking for something that not only delivers accurate readings, but also comes with high quality software to play your favorite courses, this can add up to a big investment.
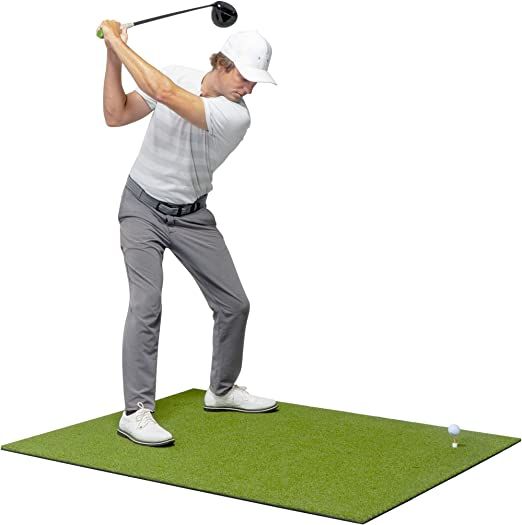
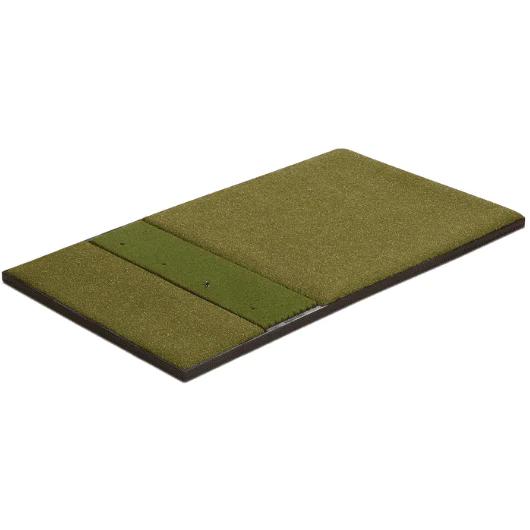
Strike mat + flooring
If you are renovating your home and want a beautiful simulator space, you will generally purchase turf flooring and put a specialized “strike mat“ in the middle of the flooring to hit off. A strike mat is important because after hitting enough golf balls, you want something that is soft enough to prevent overuse injury, hard enough to last, and ideally, be made of a material that you can use a regular wooden golf tee with! Because of these requirements, the strike mat will generally cost more than the flooring itself.
Projector
The impact screen will not do anything itself. To display the course you are playing on the impact screen, you will need a projector. For an optimal experience, you will want a 4K projector paired with a high-quality impact screen.
Most projectors will be mounted on the ceiling, but you can optionally mount it on the floor in low-ceiling rooms.
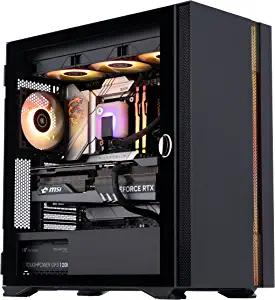
PC + Software
Launch monitor software is not your typical program run on a laptop. For some launch monitor and software combos, you will need a computer optimized with a graphics card that can support all the graphics you need to display through the projector, onto the impact screen.
That said, some setups can be run from an iPhone or iPad.
Purchasing the right launch monitor + PC + software combination can be tricky, but don‘t worry, just keep reading and I will cover everything you need to know!
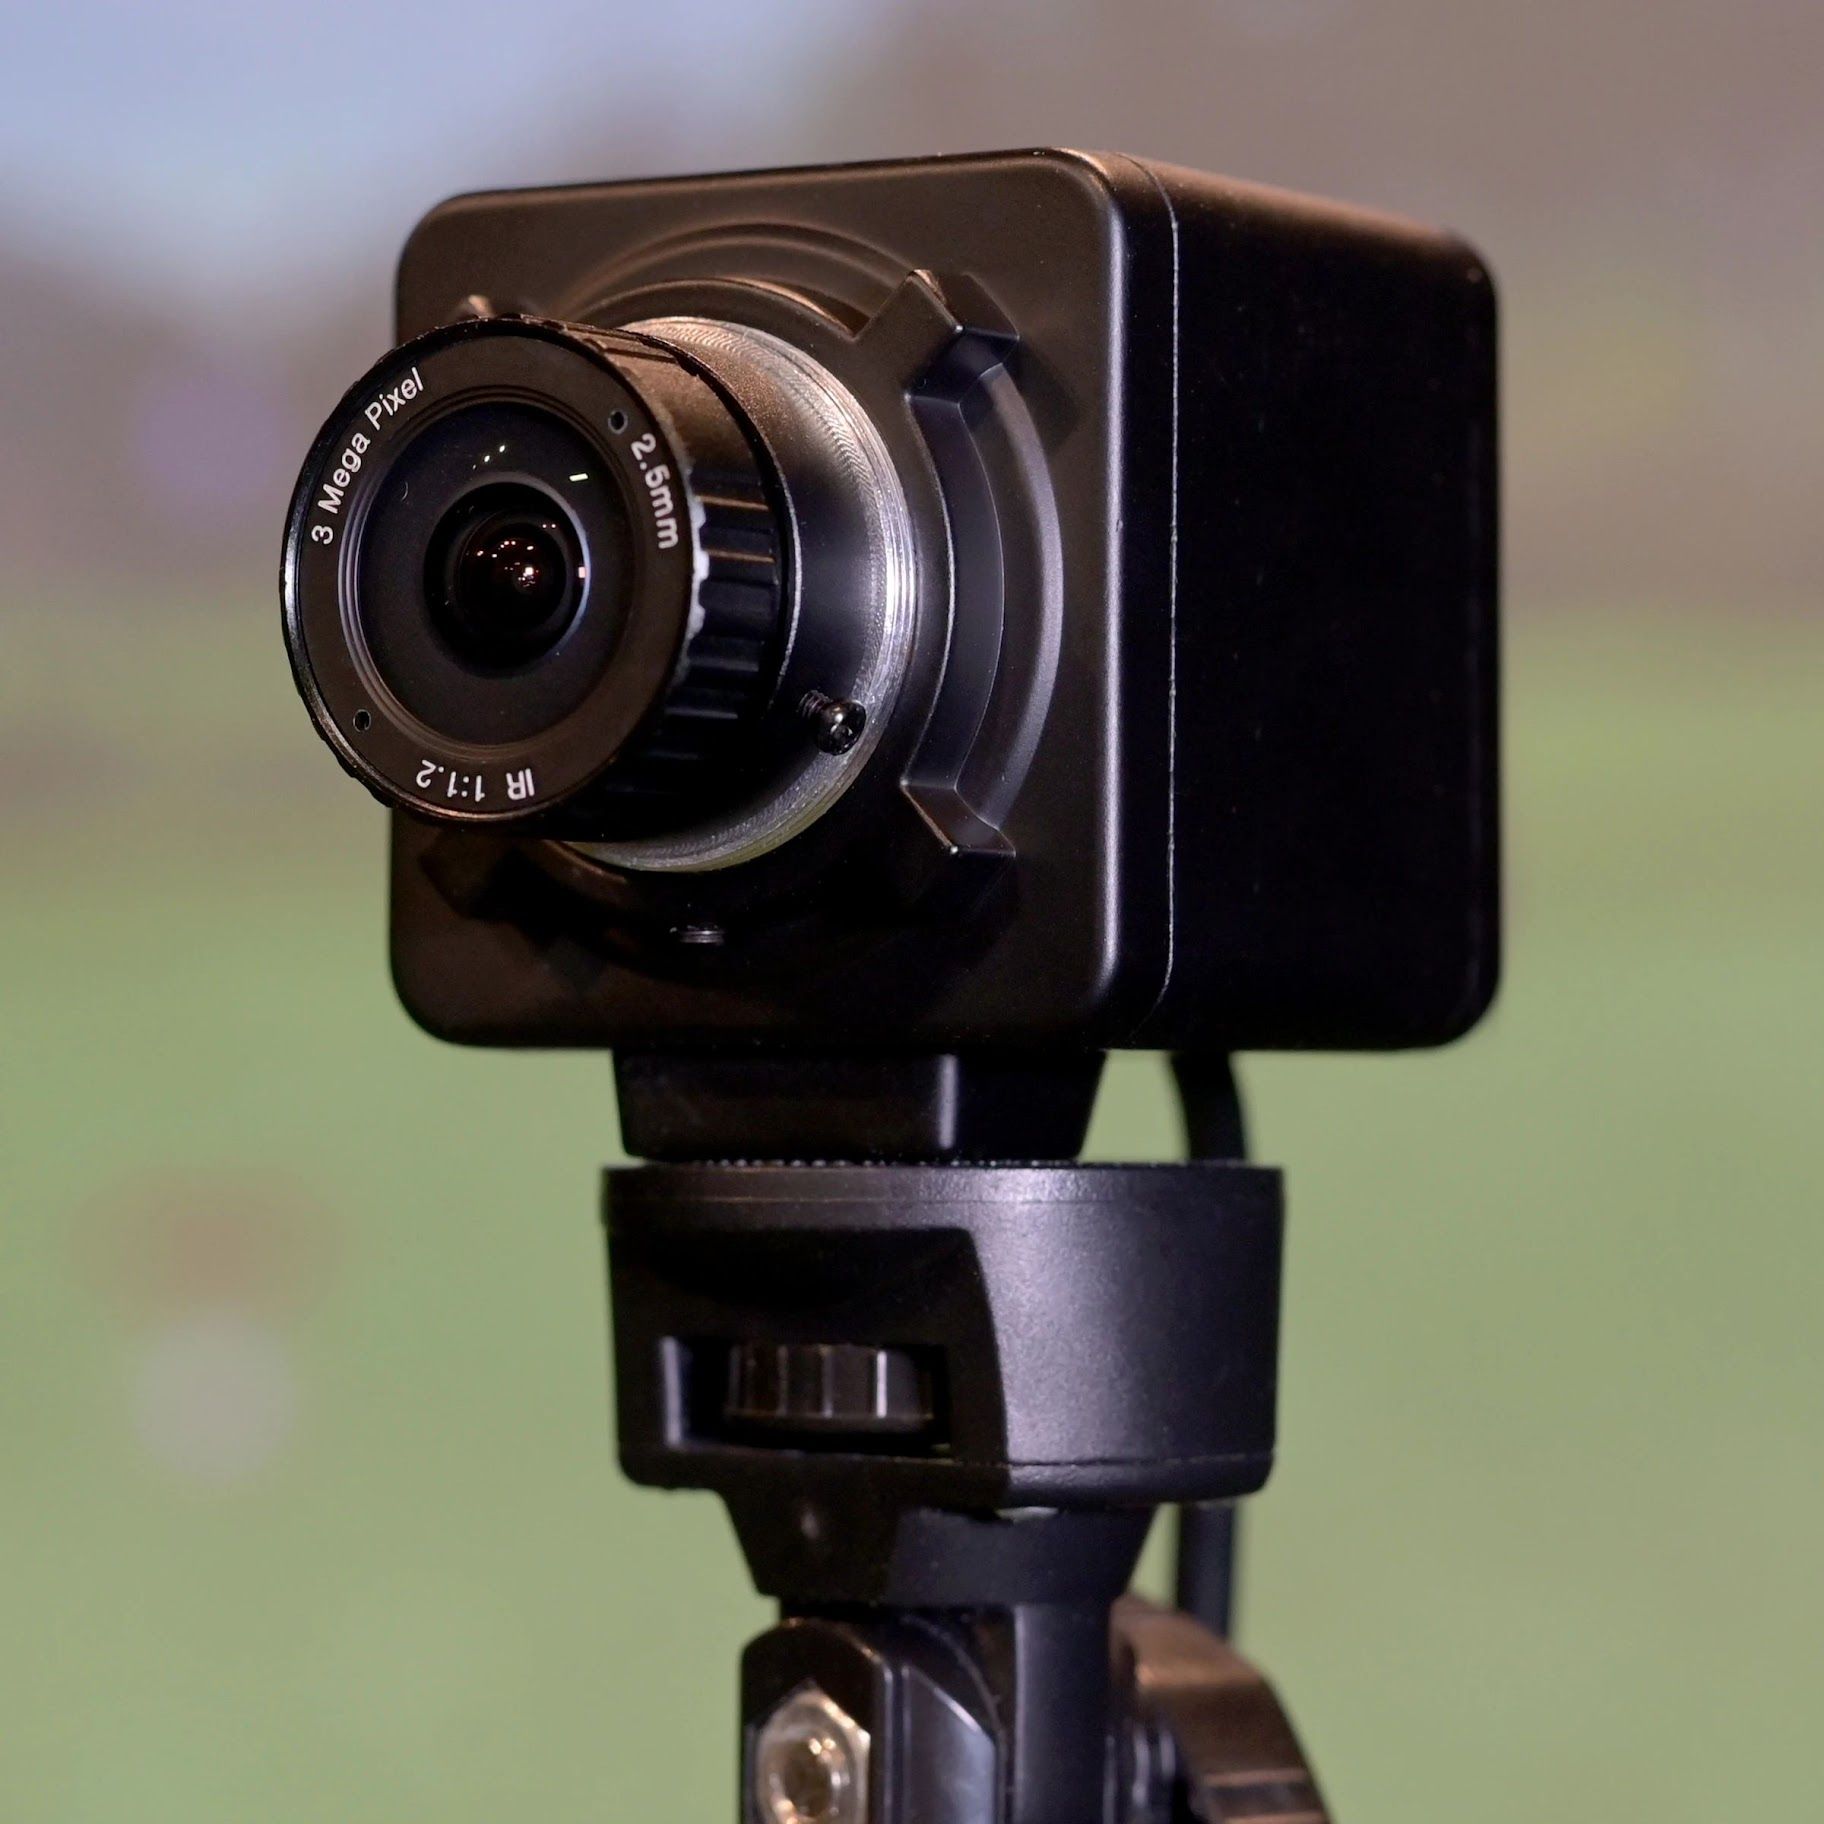
Video analysis camera (optional)
If you are turning your home golf simulator build into a practice area, you will likely want a high-speed camera that can capture your swing. The reason you need a high-speed (high frame-rate) camera is because most standard cameras (including your iPhone) cannot capture enough frames in the short time it takes you to swing a golf club. This results in blurry swing captures and can be tough to analyze!
Miscellanous materials
Whether it is custom lighting, a sound system, cables, extension cords, a bar, some couches, or anything else you want to add, there will be plenty of miscellaneous materials you will likely be purchasing.
How much does a home golf simulator cost?
Depending on how fancy you want to get, a home golf simulator can cost anywhere from a few hundred dollars to tens of thousands of dollars.
Below, I have provided some example builds and rough estimates of their costs. Please note, the below estimates do NOT include the cost of hiring a contractor to do home renovations, which can add significant costs.
Average cost of a barebones, DIY, budget practice area
If you‘re just looking for a place to practice during winter, you can get away with a super cheap setup:
| Item Name | Low | High |
|---|---|---|
| Budget Net | $50 | $100 |
| Budget Mat | $50 | $100 |
| Total Cost | $100 | $200 |
I would NOT recommend this setup. At the very least, invest in a high quality mat that is big enough to both stand on and hit the ball from. In my opinion, practicing on bad mats is bad for your game and can even cause injuries!
Average cost of a DIY, budget home golf simulator build
Let‘s step it up a notch. Below is the minimum I would expect to spend if you want a budget, game improvement center.
| Item Name | Low | High |
|---|---|---|
| Budget Net | $50 | $100 |
| Quality Mat | $100 | $500 |
| Budget Launch Monitor | $300 | $500 |
| Total Cost | $450 | $1,100 |
Average cost of a basic home golf simulator build
Below is what I would consider the “value play“. With this build, you will have a beautiful simulator setup in your basement that you can use to entertain or practice the game comfortably in.
This build represents “as cheap as possible without sacrificing quality“.
| Item Name | Low | High |
|---|---|---|
| Quality Launch Monitor | $2,000 | $7,000 |
| Strike Mat + Flooring | $500 | $1,500 |
| Impact Screen | $500 | $1,500 |
| Projector | $500 | $2,000 |
| PC + Simulator Software | $500 | $1,000 |
| Miscellaneous | $100 | $1,000 |
| Total Cost | $4,100 | $14,000 |
Average cost of a premium home golf simulator build
At this point, you are doing a full home renovation and you should expect to spend some money to get this right.
| Item Name | Low | High |
|---|---|---|
| Premium Launch Monitor | $12,000 | $25,000 |
| Strike Mat + Flooring | $500 | $3,000 |
| Premium Impact Screen | $2,000 | $4,000 |
| 4K Projector | $1,500 | $5,000 |
| PC + Simulator Software | $1,000 | $3,000 |
| Miscellaneous | $100 | $5,000 |
| Total Cost | $17,100 | $45,000 |
Best DIY Budget Simulator Build
This build is great for someone who wants a quality DIY setup on a budget. While it is not "cheap" by any means, it is on the lower end of the price range when it comes to home golf simulator builds. This build also has the added benefit of being great for outdoor spaces and portable.
Cost breakdown
In total, you can expect to spend around $800 for this build. Below is the cost breakdown by component.
| Item Name | Avg. Cost |
|---|---|
| Garmin Approach R10 | $600 |
| GoSports Golf Practice Hitting Net | $80 |
| GoSports Golf Mat | $100 |
| Total Cost | $780 |
Materials Overview
Launch Monitor
For this build, we‘re going with the Garmin Approach R10 launch monitor because it provides great value at an affordable pricepoint.
In addition to great value, the Approach R10 is portable, which means this setup can be used in your basement, backyard, or even taken to your local range for immediate feedback on your practice.

I LOVE this launch monitor. With fairly accurate shot distances and a TON of integrations, you're getting a lot of bang for your buck here.
Net
For this build, we‘re going with the GoSports practice net due to its overall affordability and value.

A budget-friendly, simple golf hitting net for any space.
Mat
For this build, we‘re going with the GoSports practice mat due to its overall affordability and value.
A budget-friendly, yet high-quality golf hitting mat for any space.
Best Value Build
If you are looking to make an investment in quality materials that last while also being conscious of your budget, this build offers a great combination of quality and value.
Cost breakdown
In total, you can expect to spend around $5,000 for this build. Below is the cost breakdown by component.
| Item Name | Avg. Cost |
|---|---|
| SkyTrak Launch Monitor | $1,995 |
| Fiberbuilt 4' x 7' Studio Golf Mat | $1,149 |
| Carl's Place DIY Enclosure | $969.95 |
| BenQ TH671ST Projector | $799 |
| Total Cost | $4,912.95 |
Materials Overview
Launch Monitor
For this build, we‘re going with the Skytrak launch monitor as it provides a great overall experience at a reasonable price. While this won&lquo;t be as accurate as other models like the GC3, it still provides some great feedback and offers a premium experience.
One of the best photometric launch monitors on the market, you can't go wrong with the Foresight GC3. A tour favorite.
Mat
For this build, we‘re going with the Fiberbuilt grass series mat. This mat has a one-way hitting strip that can be replaced when it wears out. It is great for a monitor like the GC3 because of this one-way orientation.
This is one of the highest-quality golf mats you can buy and will last you a long time. It also has a replaceable hitting area, a huge plus!
Enclosure
For this build, we‘re going with the Carl‘s Place DIY enclosure, which comes with an impact screen. Be sure to measure your space and order the correctly sized screen!
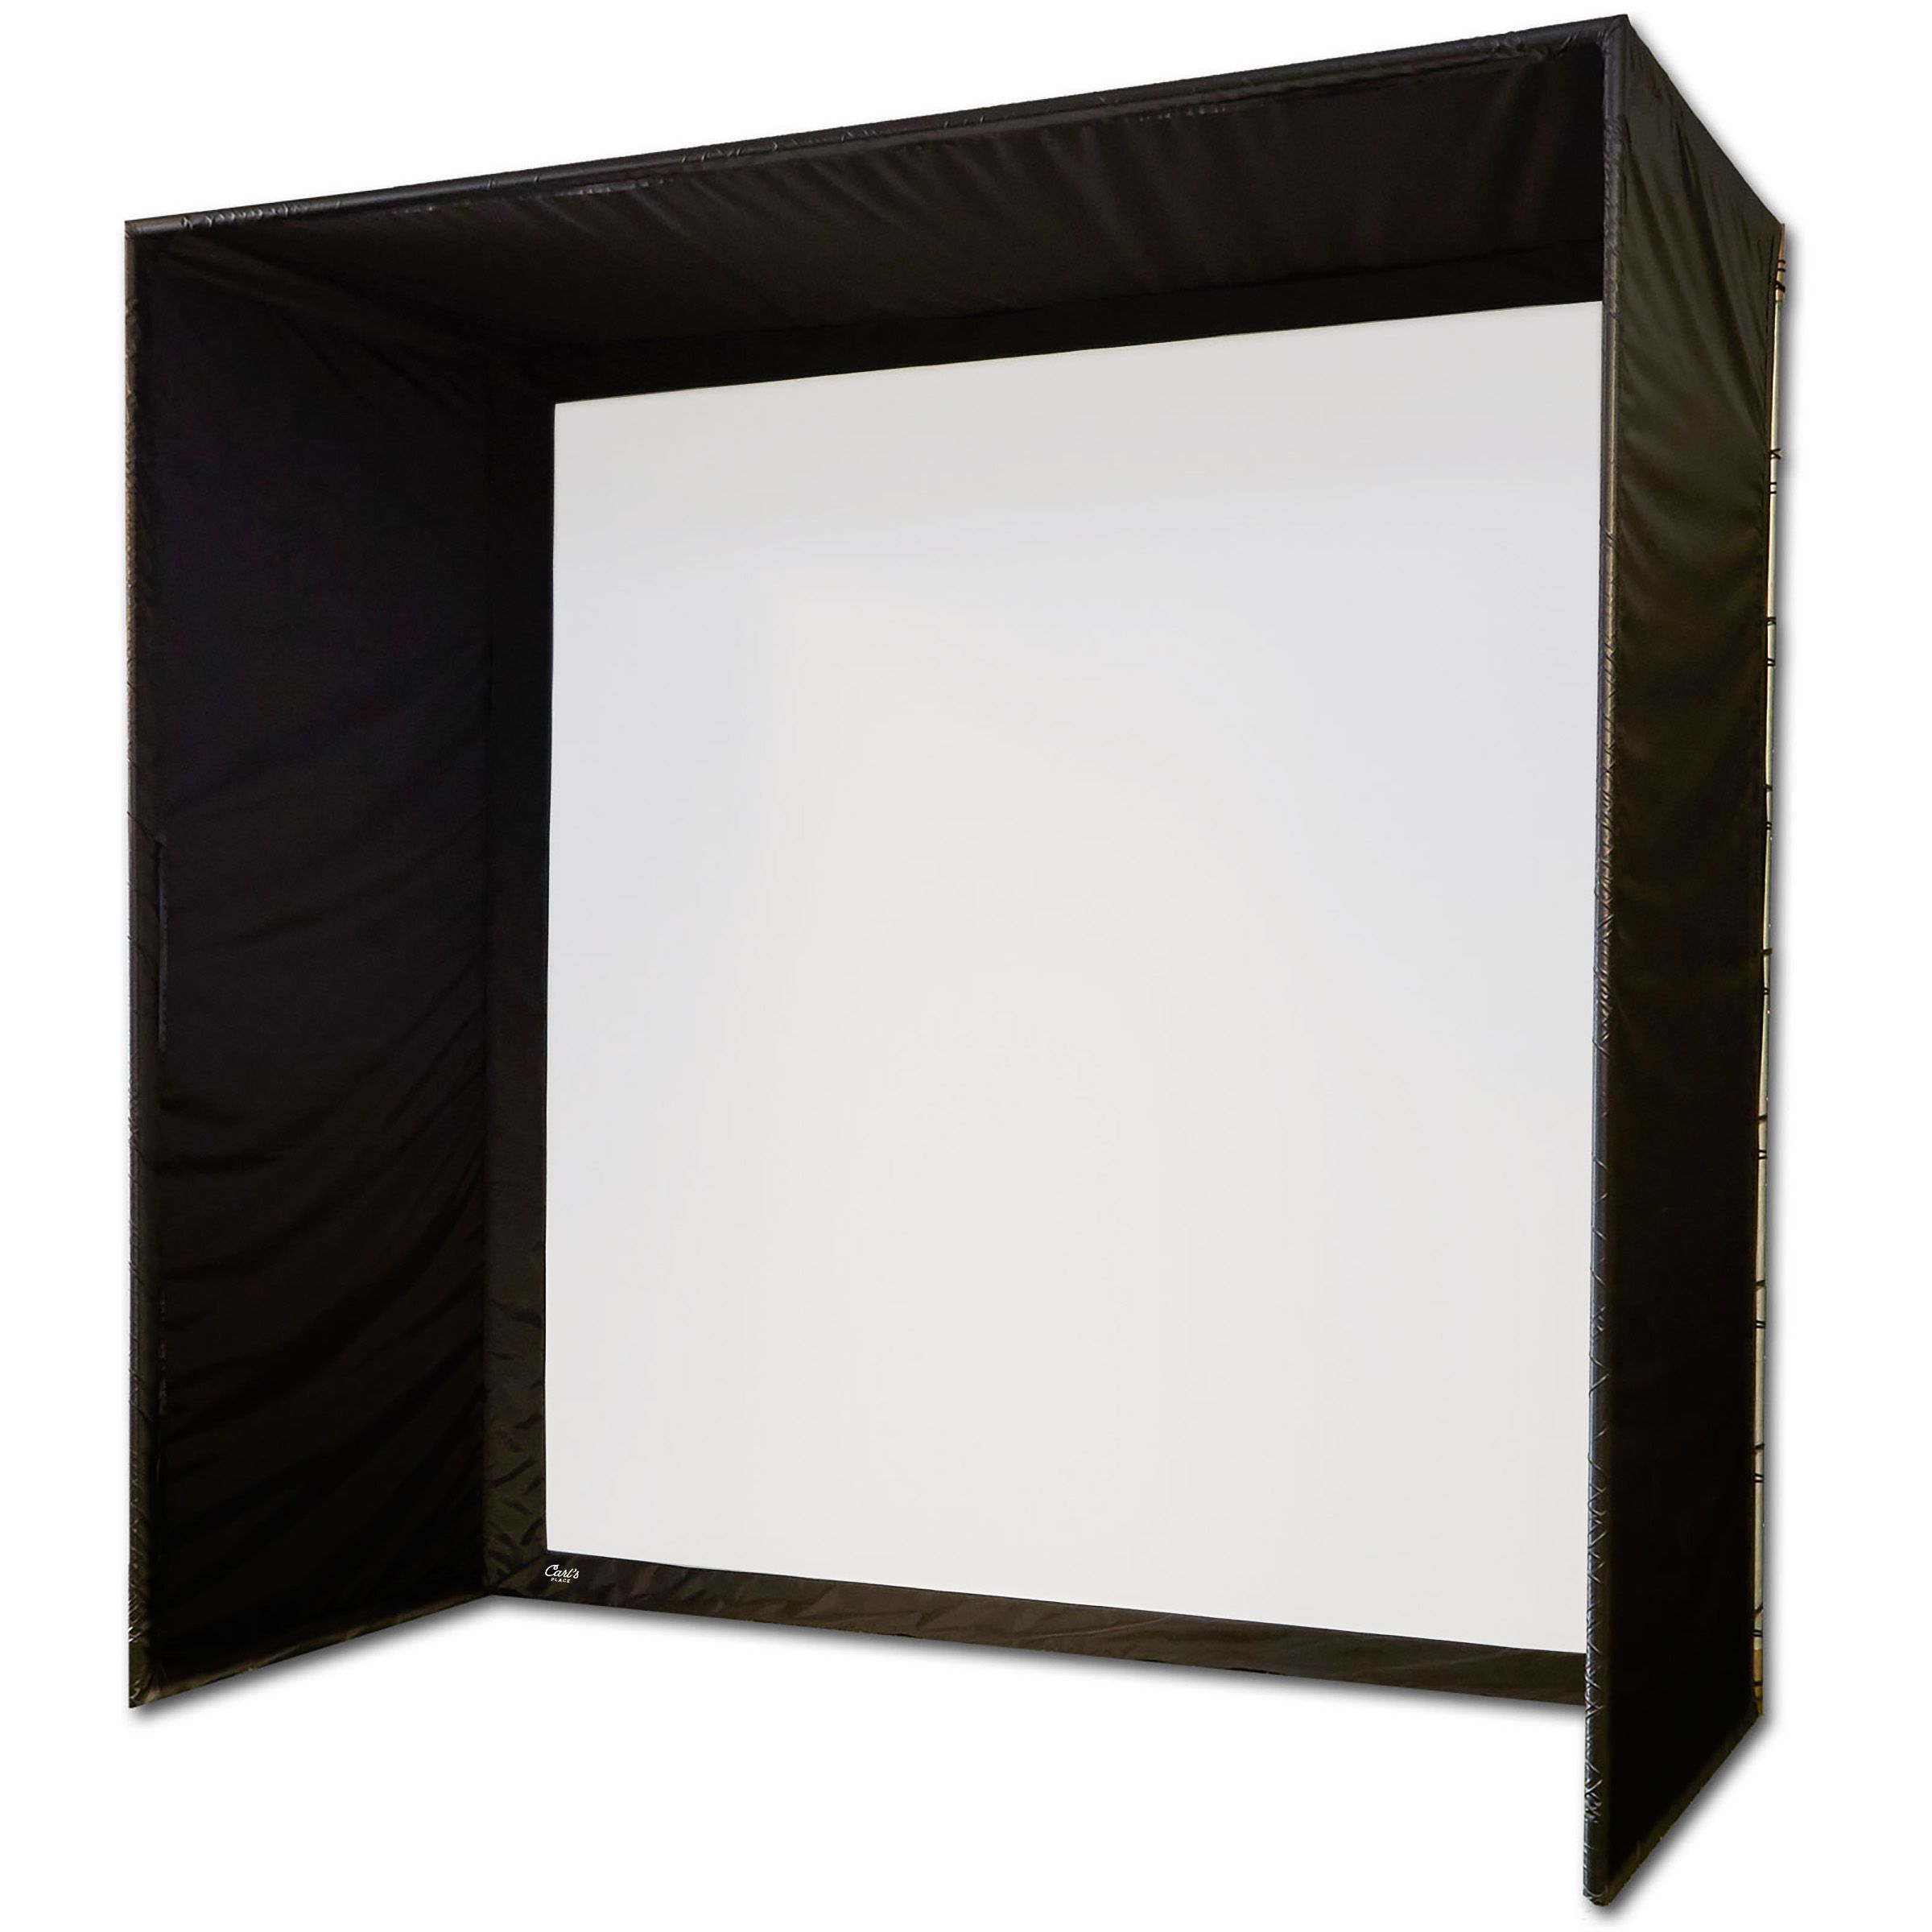
A high-quality, yet basic home golf simulator enclosure from one of the most reputable companies in the golf simulator market!
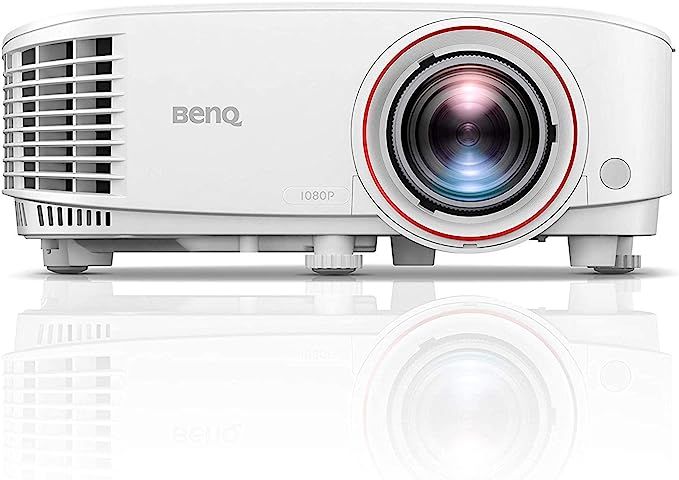
Projector
For this build, we‘re going with the BenQ TH671ST projector. This is a short-throw projector and offers great value to match up with the impact screen above. If you are looking for a more premium experience, consider upgrading both the impact screen and projector to premium versions (see premium build below).
A budget-friendly short-throw projector that is perfect for any home golf simulator build.
Best Build for Tight Spaces
While not the cheapest, this build is great for someone who wants a quality home golf simulator but doesn't have much space. The launch monitor sits on the floor next to the ball and the mat is optimized for one-way hitting. This not only allows for a shorter ceiling, but also a narrower room.
Cost breakdown
In total, you can expect to spend around $10,000 for this build. Below is the cost breakdown by component.
| Item Name | Avg. Cost |
|---|---|
| Foresight GC3 Launch Monitor | $7,499 |
| Fiberbuilt 4' x 7' Studio Golf Mat | $1,149 |
| Carl's Place DIY Enclosure | $969.95 |
| BenQ TH671ST Projector | $799 |
| Total Cost | $10,416.95 |
Materials Overview
Launch Monitor
For this build, we‘re going with the Foresight GC3 launch monitor because it sits on the ground just a few inches from the ball. This eliminates the need for a high ceiling (9 feet will do) and also allows you to get away with a 12 foot wide space since the simulator sits on one side and doesn‘t need to be centered.
While the GC3 is not cheap, it is a highly rated launch monitor that you can be confident will deliver accurate readings and provide a great overall experience.
One of the best photometric launch monitors on the market, you can't go wrong with the Foresight GC3. A tour favorite.
Mat
For this build, we‘re going with the Fiberbuilt grass series mat. This mat has a one-way hitting strip that can be replaced when it wears out. It is great for a monitor like the GC3 because of this one-way orientation.
This is one of the highest-quality golf mats you can buy and will last you a long time. It also has a replaceable hitting area, a huge plus!
Enclosure
For this build, we‘re going with the Carl‘s Place DIY enclosure, which comes with an impact screen. Be sure to measure your space and order the correctly sized screen!
A high-quality, yet basic home golf simulator enclosure from one of the most reputable companies in the golf simulator market!
Projector
For this build, we‘re going with the BenQ TH671ST projector. This is a short-throw projector and offers great value to match up with the impact screen above. If you are looking for a more premium experience, consider upgrading both the impact screen and projector to premium versions (see premium build below).
A budget-friendly short-throw projector that is perfect for any home golf simulator build.