Table of Contents

Last updated Nov 03, 2023
How to Use Lead Tape
Lead tape is by far the easiest way to change the swing weight of a golf club, which changes the overall "feel" of that club and can help your swing tempo.
Written By: Zach Gollwitzer
Posted in: DIY Clubmaking
Lead tape is a great way to experiment with different swing-weights because it is so versatile. You can put it on at the range, and take it off as well. This page will teach you how to apply lead tape to different types of clubs.
Before You Start, You Must:
- Understand What Swing-Weight Is
- Measure the current swing-weight of the club you are applying the lead tape to
Here is a reference before we start:
| Length | Swing Weight Points |
|---|---|
| 4.5 inches 1/2" lead tape | 1 Swing-weight Point |
| 3.15 inches 1/2" high density lead tape | 1 Swing-weight Point |
How to Apply Lead Tape
In order to get the lead tape to stick to the area that you are applying it, you must make sure that the area is clean. Also, you can lightly sand down the area with 200-800 grit sandpaper to prep the surface. Last, the area must be relatively flat.
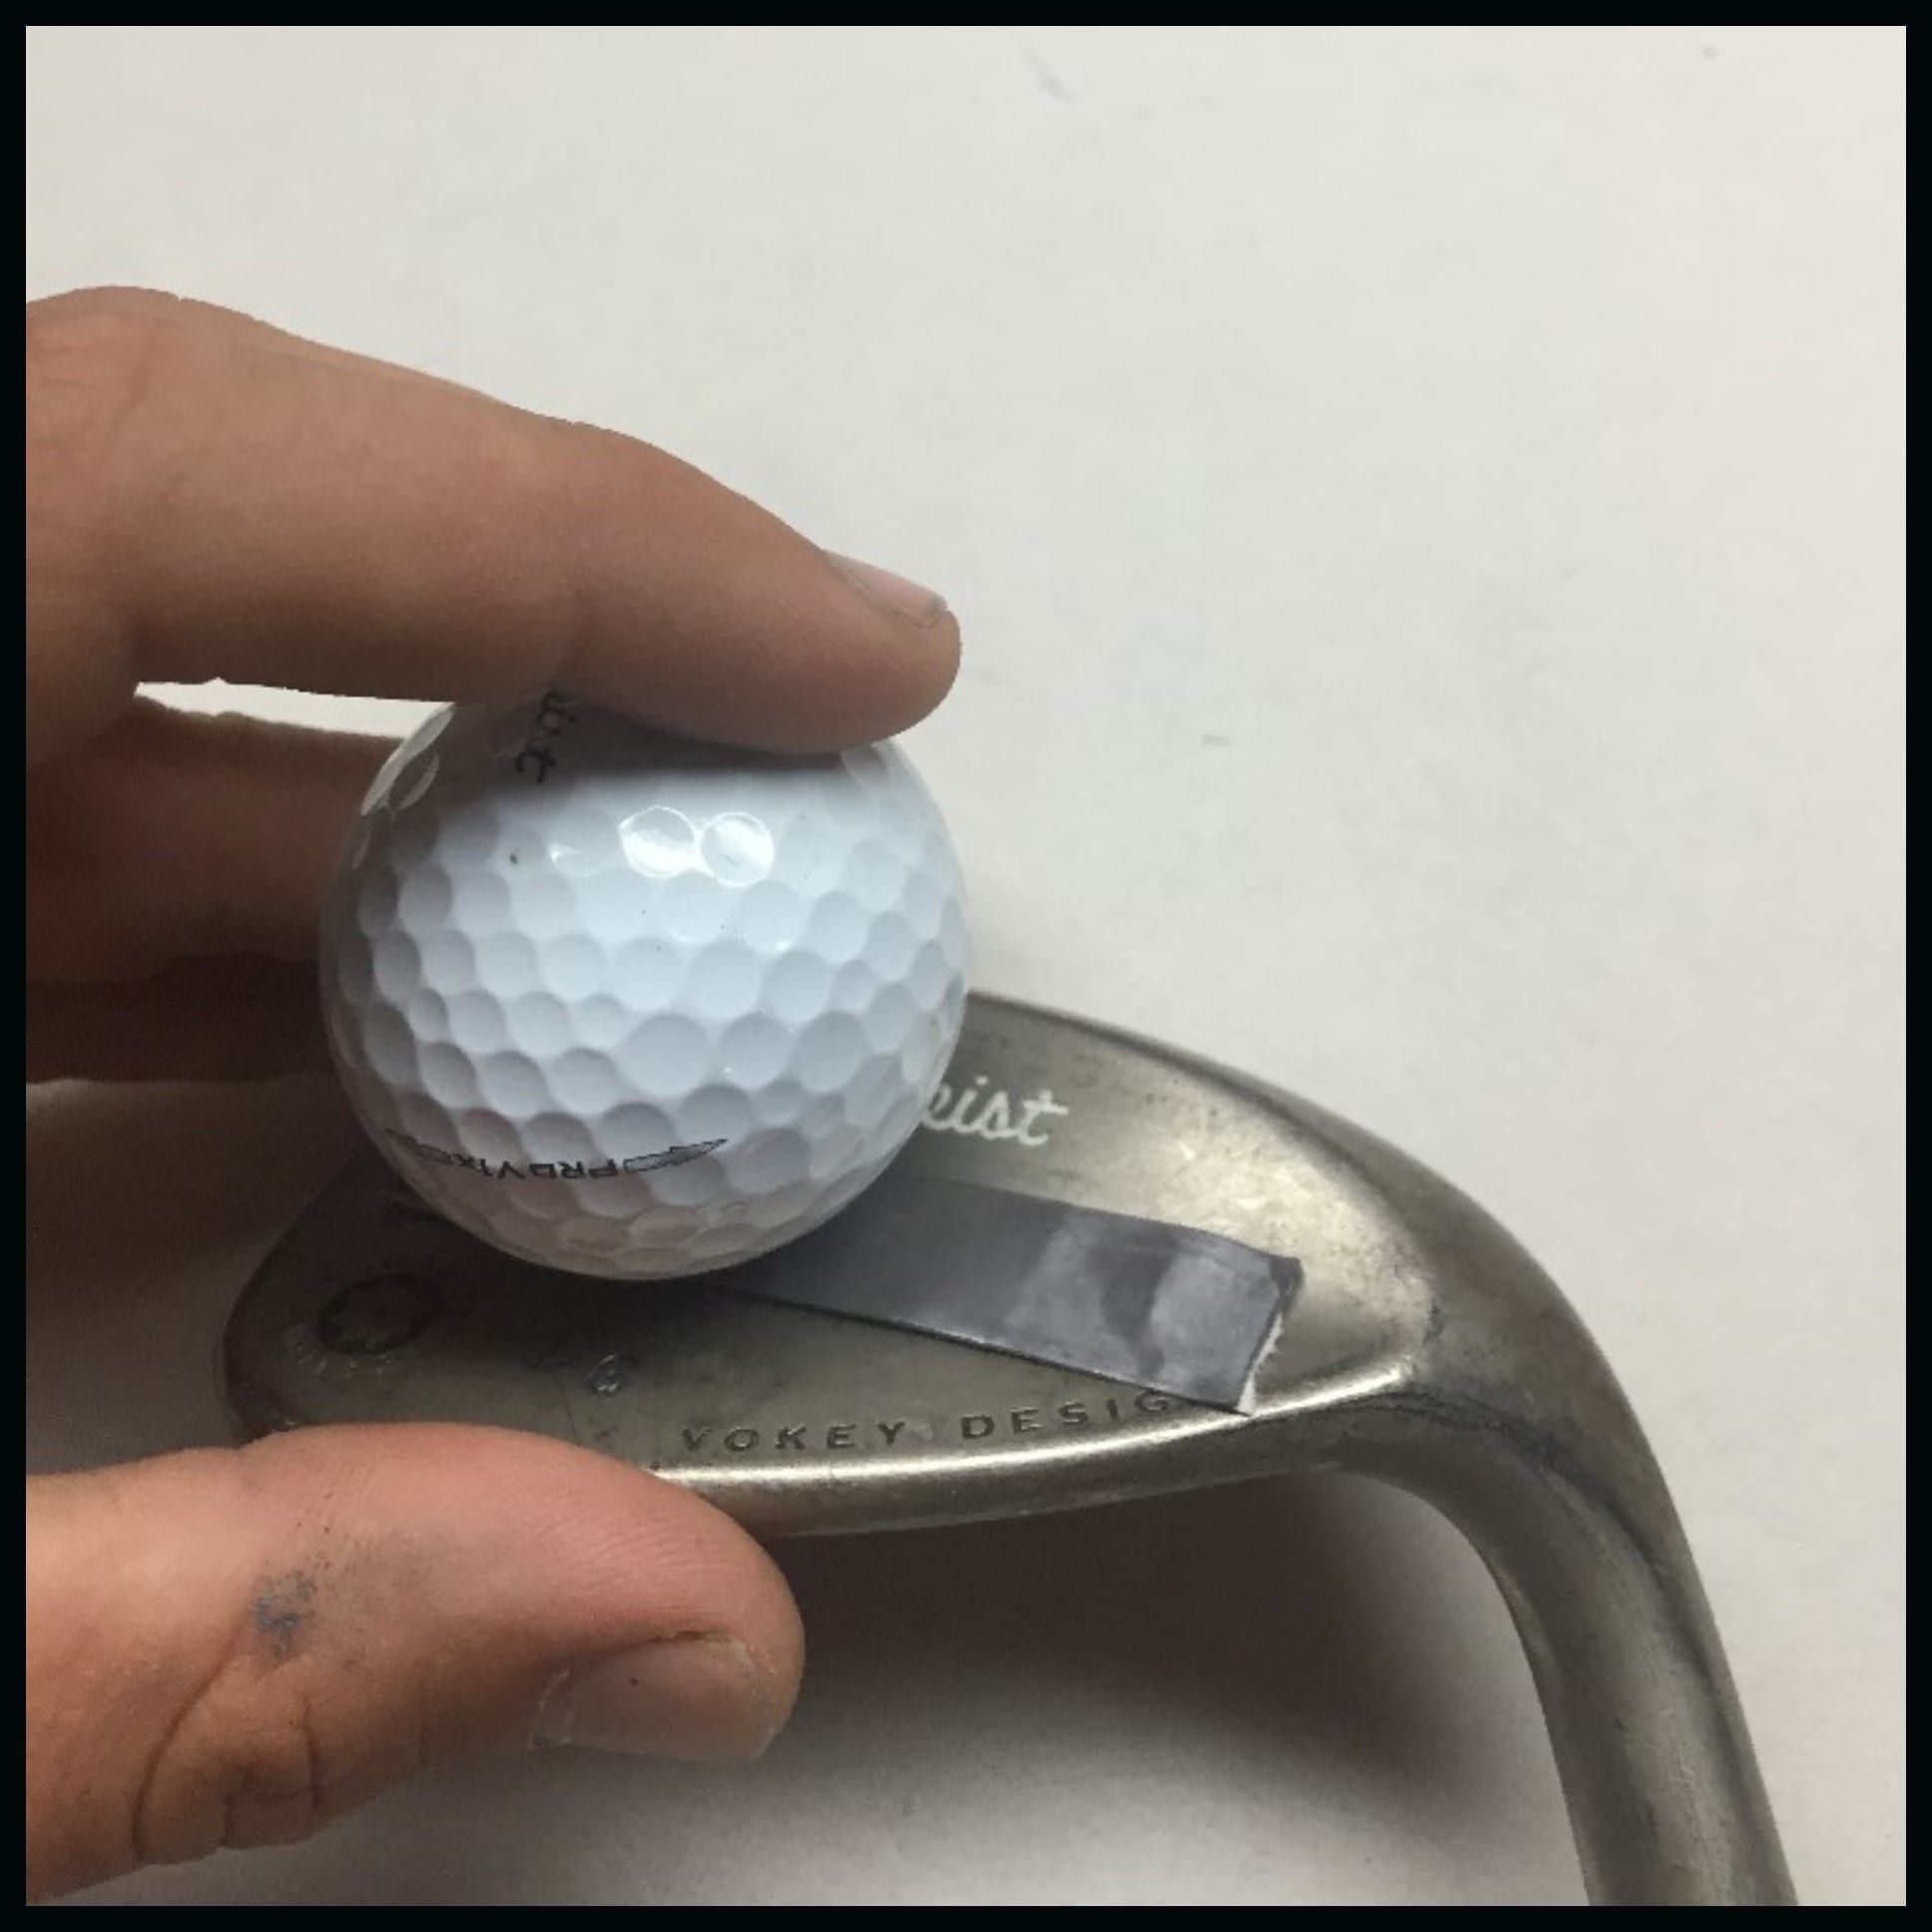
Once you have chosen an area, prepped it, and applied the lead tape, use a golf ball to flatten it out. A credit card works too.
Putter
There are two areas that you can apply lead tape to on a putter. Some putters are oddly shaped, so if in doubt, always apply the tape to the sole of the putter.
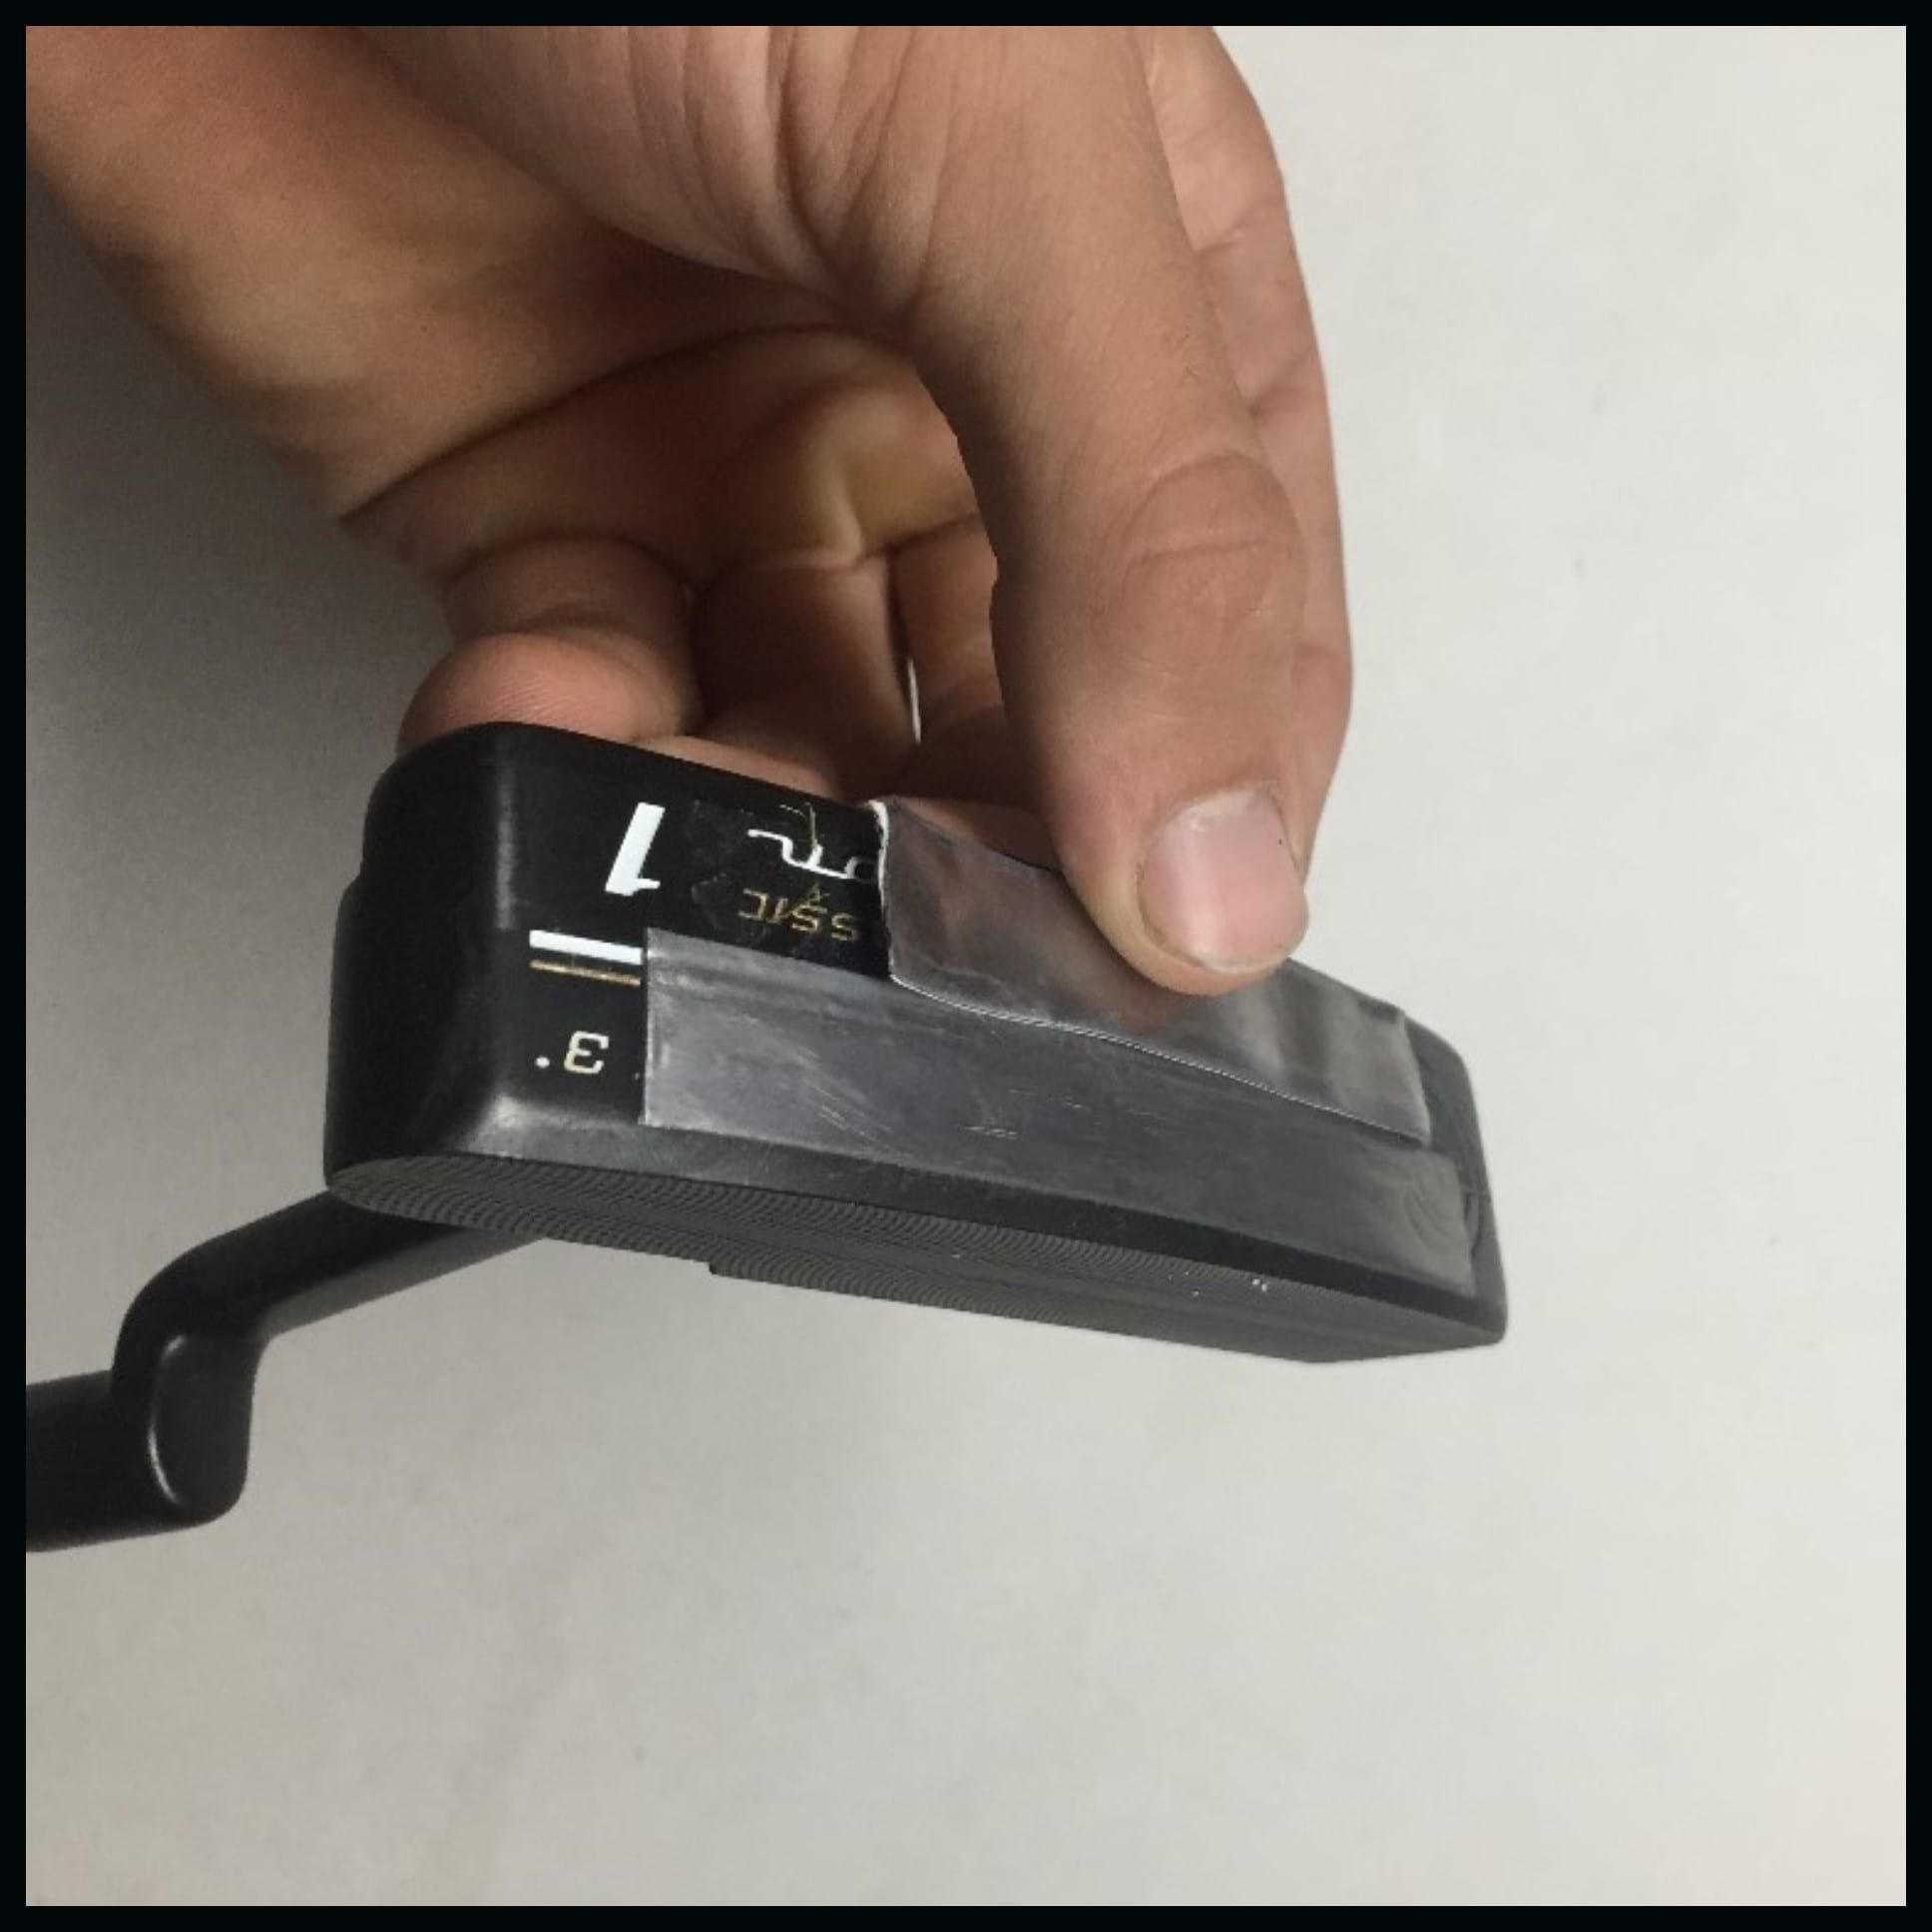
Irons and Wedges
When applying lead tape to irons and wedges, make sure you are putting it where all of the weight is. As in the picture, you can see that I'm applying the tape to the thick part of the wedge.

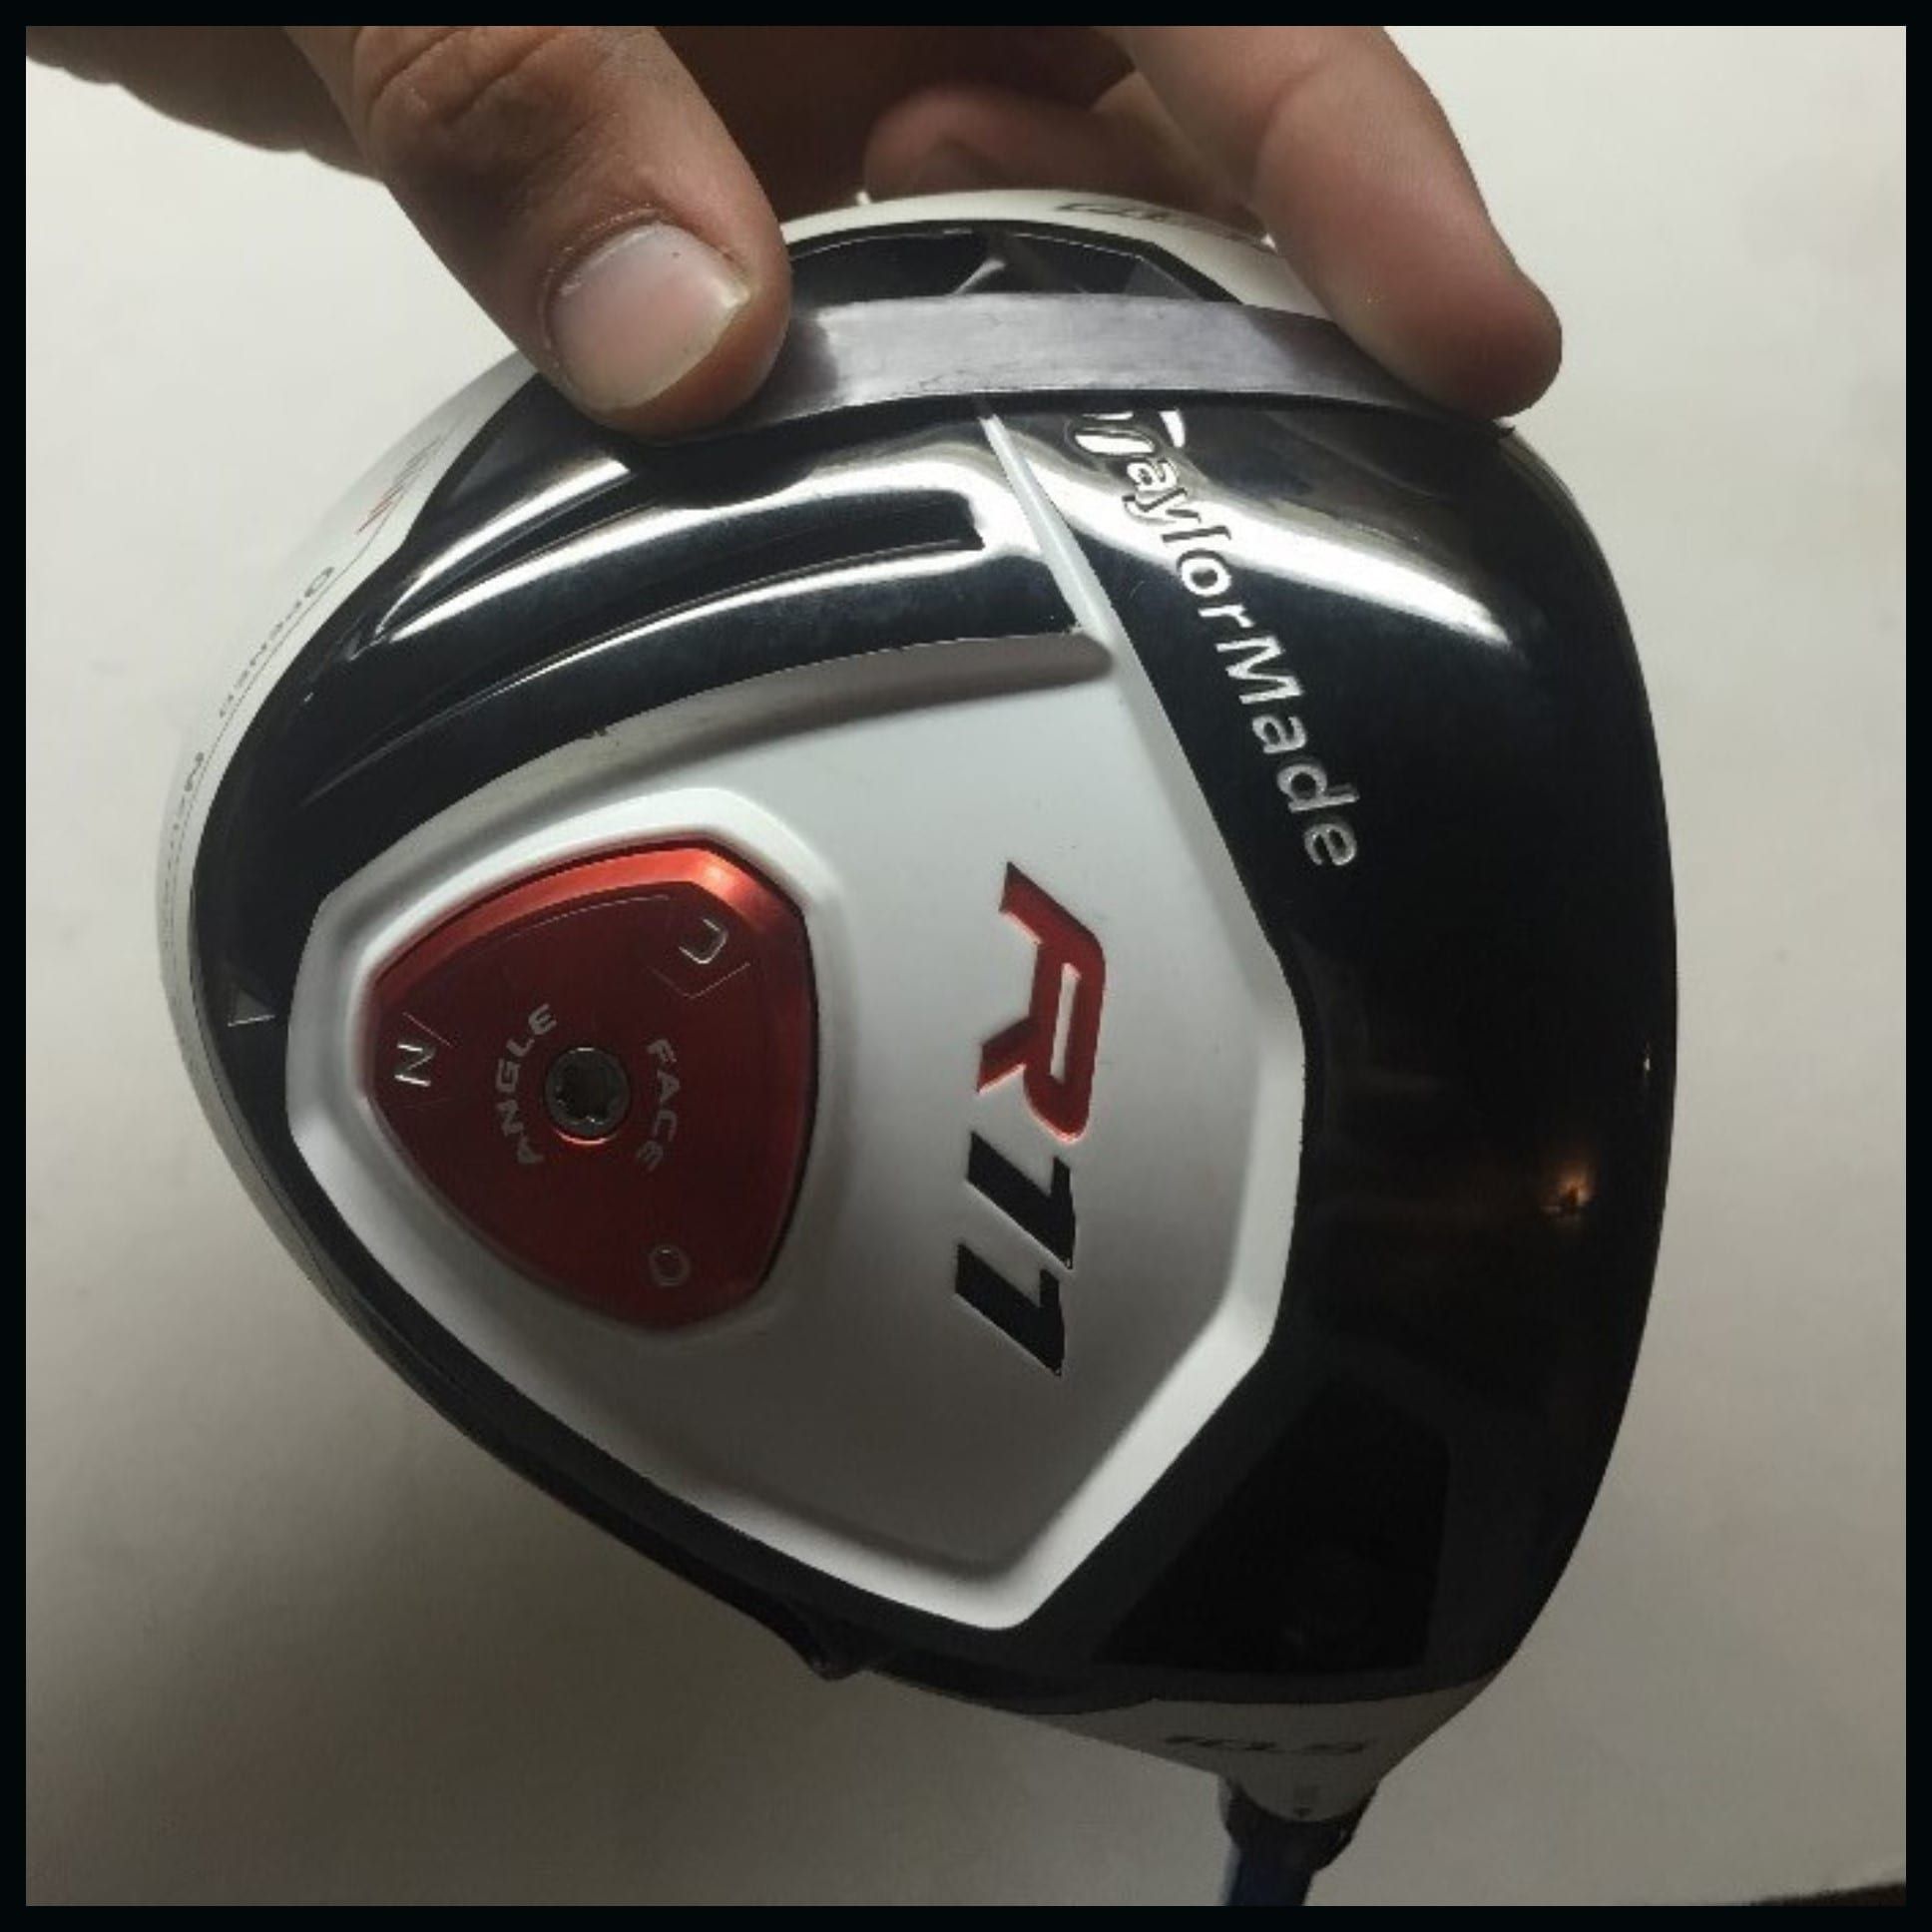
Hybrids, Woods, Drivers
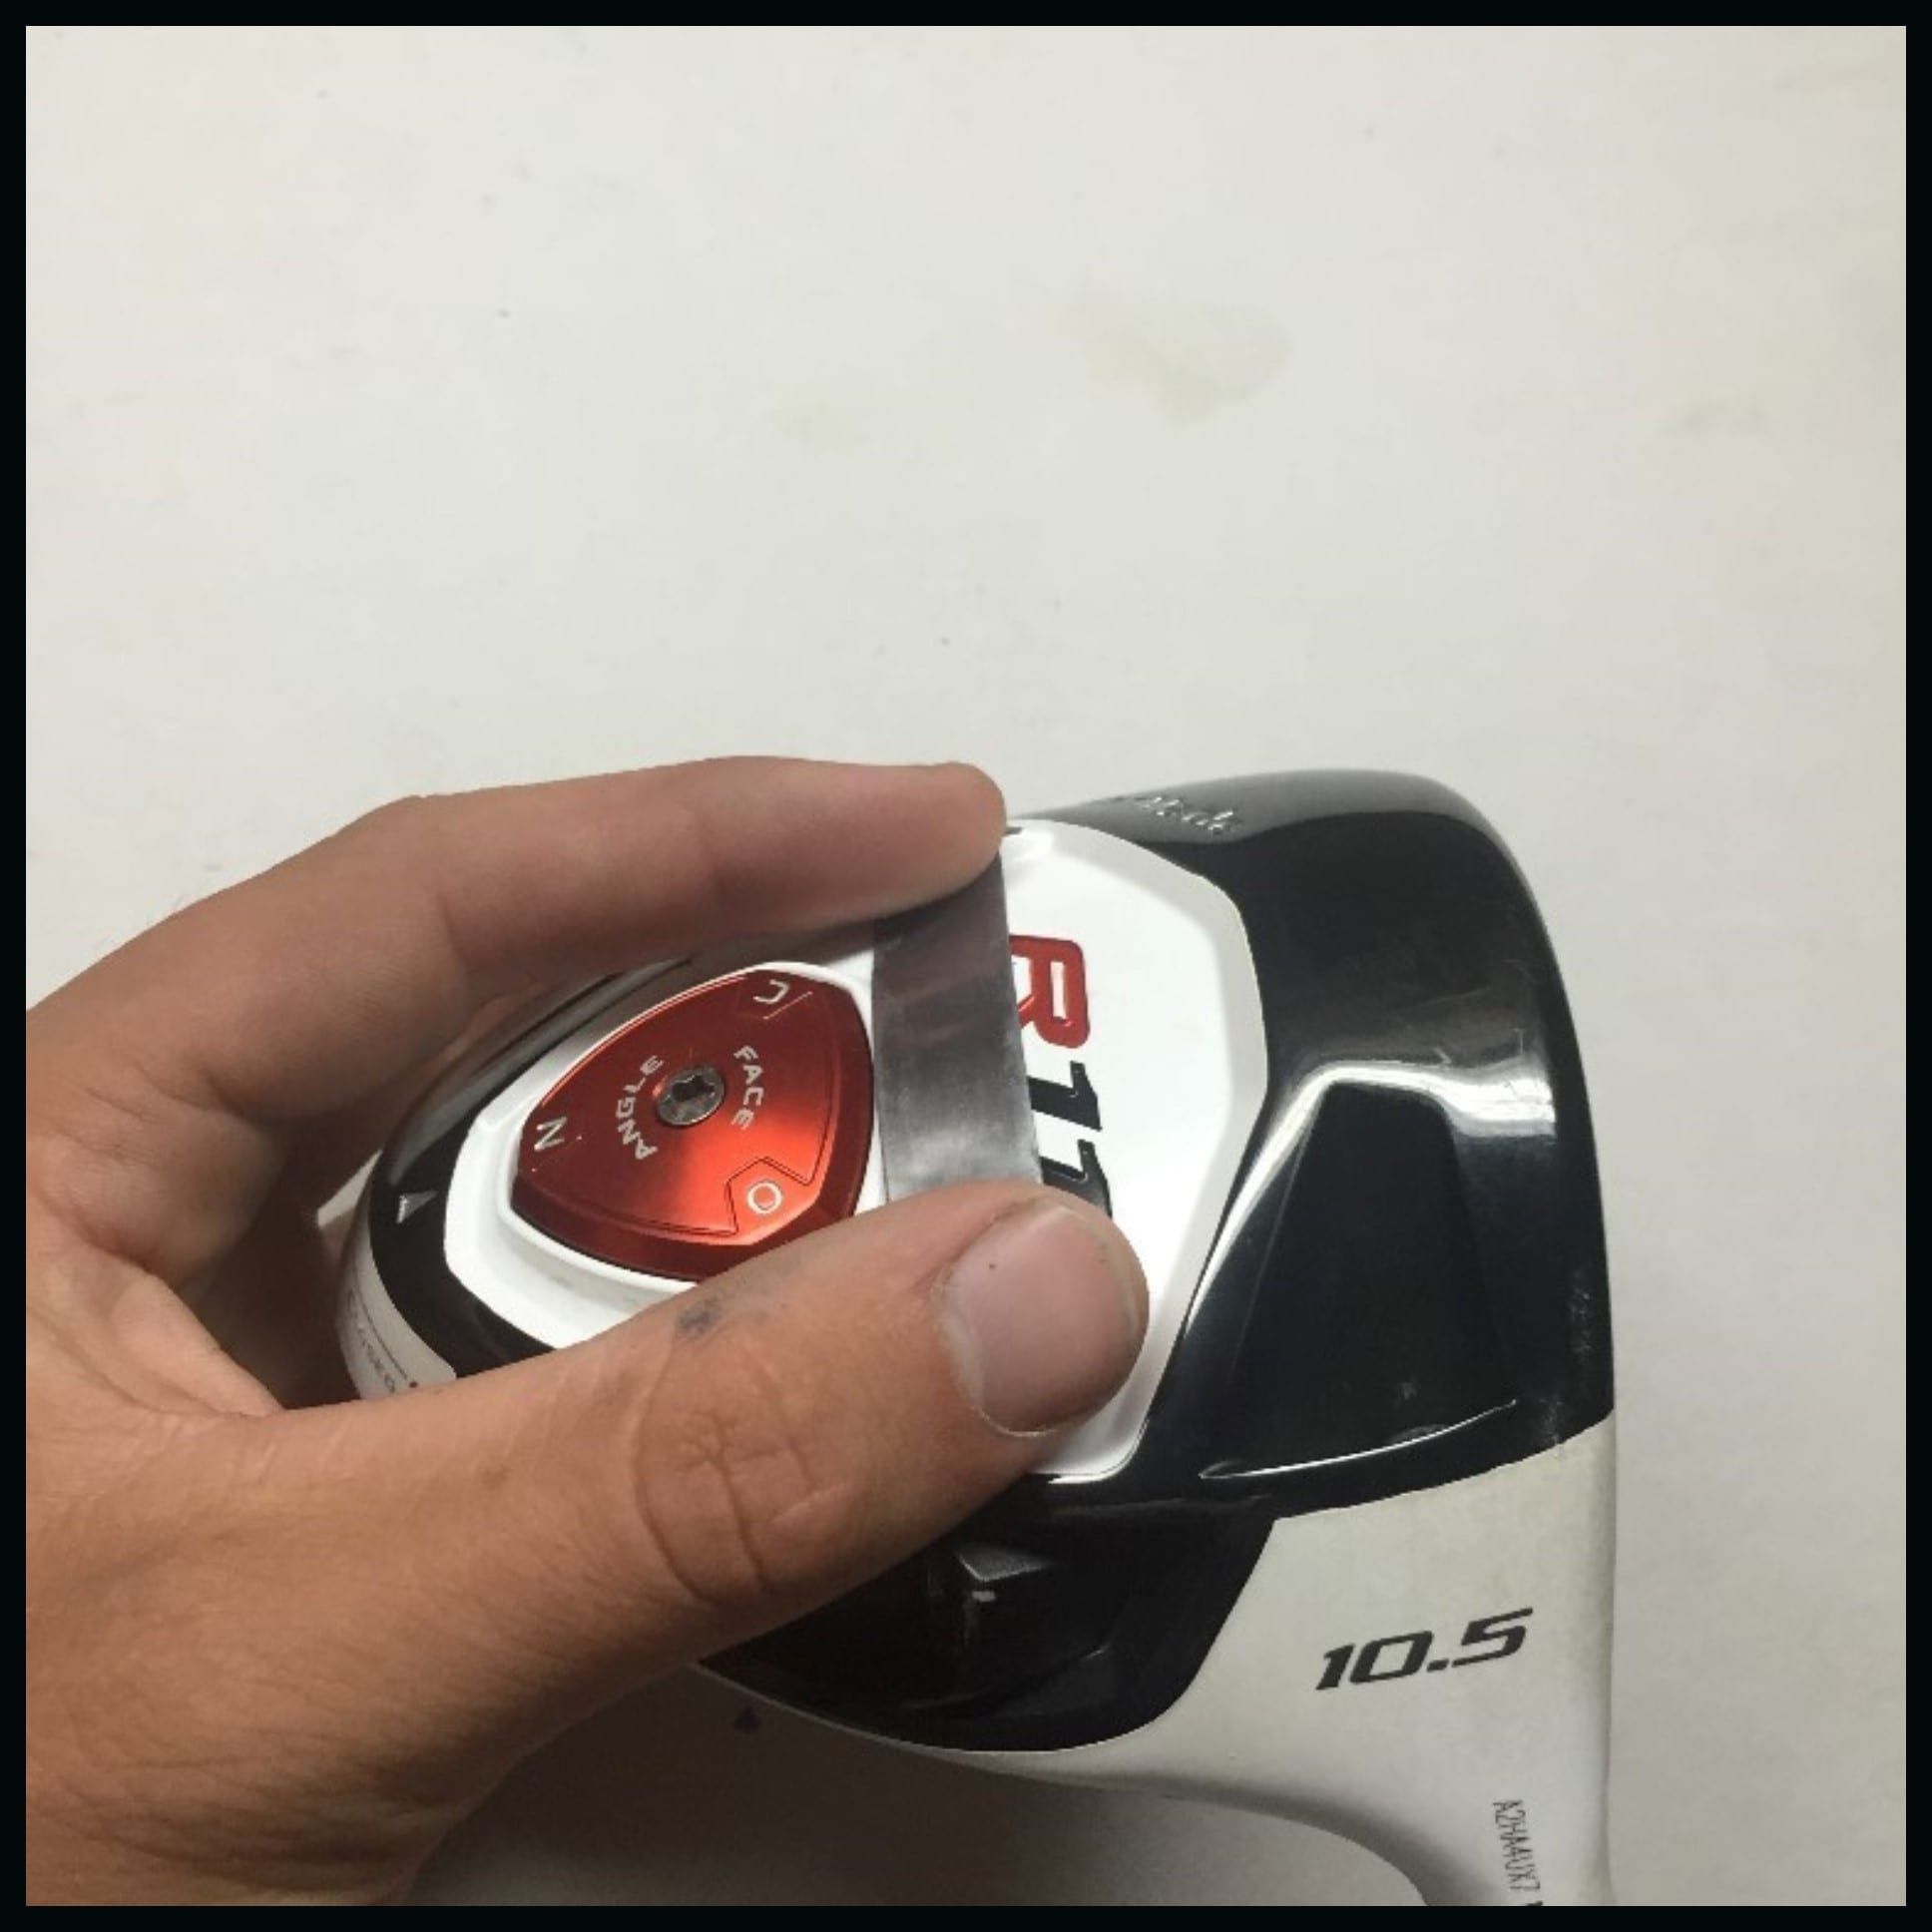
There are a few options when it comes to the tee clubs. Believe it or not, where you apply the lead tape can significantly affect the shape of your shots.
This first photo is an example of a "neutral" lead tape application. This will not alter your ball flight.
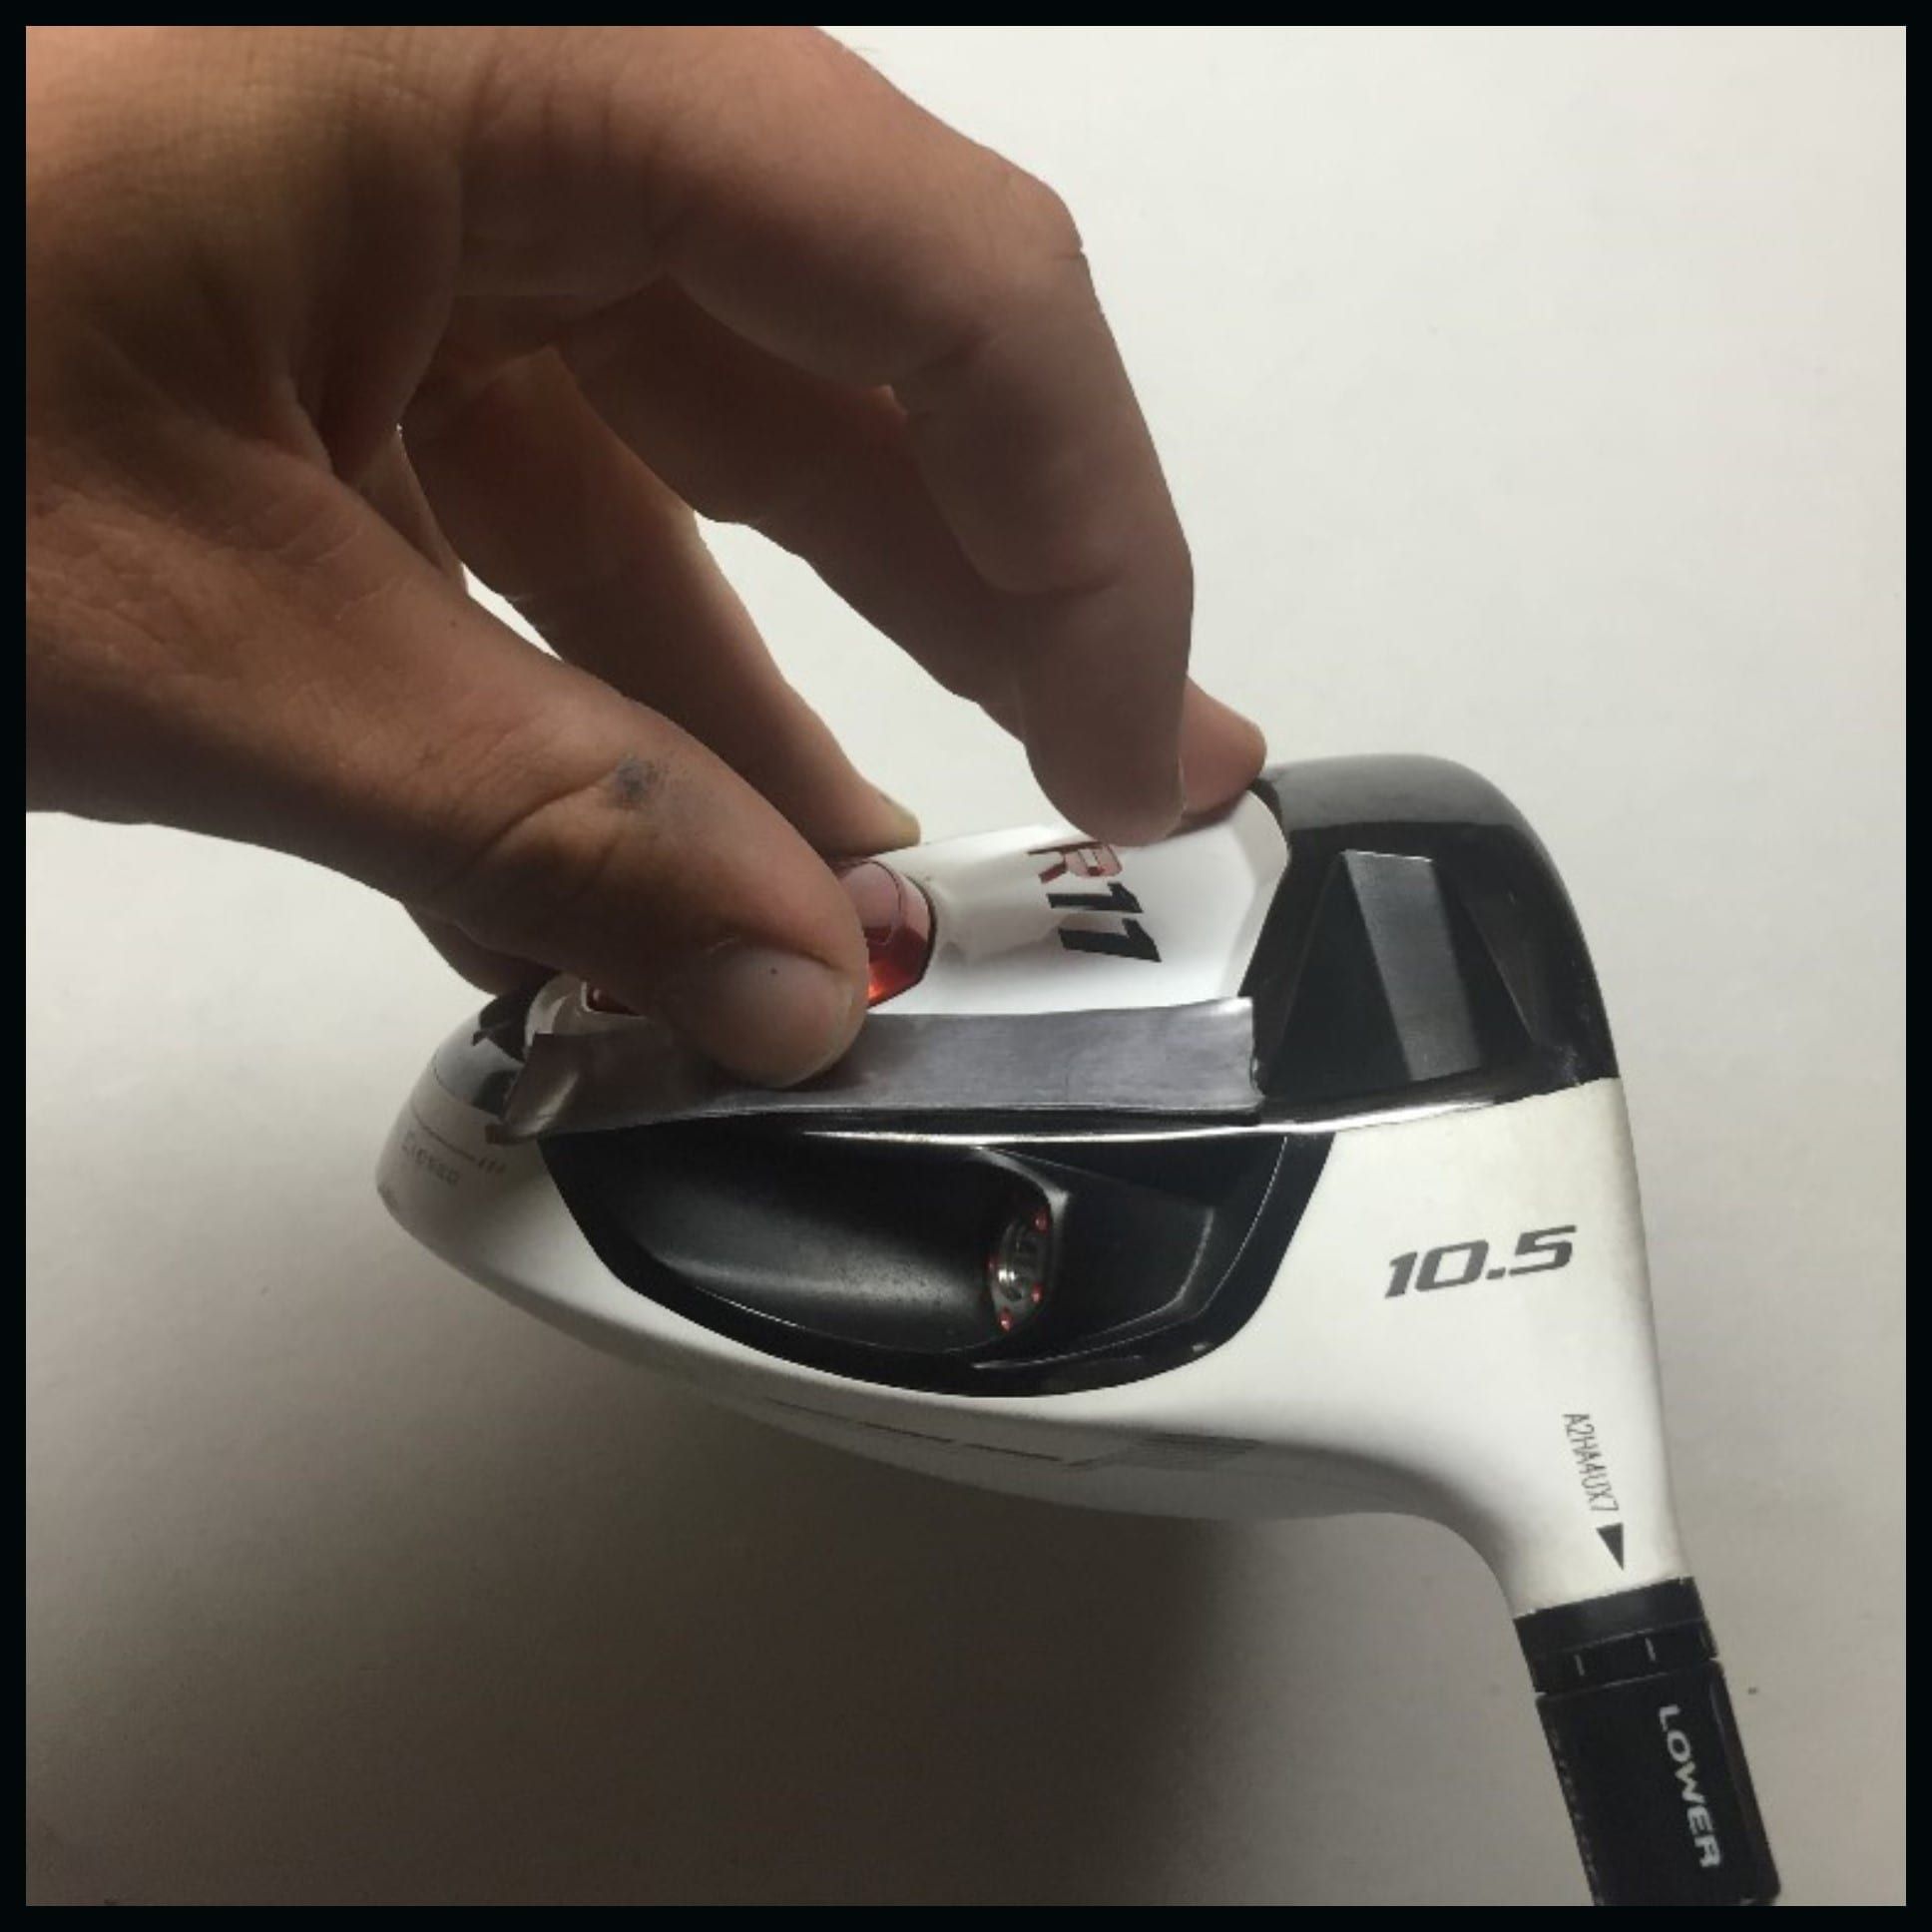
The next photo is an application to the toe of the club. When you put weight on the toe of the club, it slows down the "closing" or "rotation" of the clubface, promoting a left to right shot for the right-handed golfer, and a right to left shot for the left-handed golfer. In other words, applying lead tape to the toe promotes a fade shot shape.
The final photo is an application to the heel of the club. As you can see, this driver doesn't have many places to put the lead tape, but the spot I've located should work. As the opposite effect of the previous photo, when we apply lead tape to the heel of the club, it speeds up the "closing" or "rotation" of the clubface, promoting a right to left shot for the right-handed golfer, or a left to right shot for the left-handed golf. In other words, applying lead tape to the heel promotes a draw shot shape.
**Disclaimer--By no means will applying lead tape automatically cure your 40 yard banana slice. That will require lots of practice! If you put a few pieces of lead tape on the heel of the club, you might be able to turn your 5 yard fade into a straight shot or a 1 yard draw, but nothing more.
In Summary
I hope that you have found this page informative. Once again, if you are new to swing-weighting, I highly recommend using lead tape to experiment rather than getting into lead powder, counterweighting, and tip weighting.
About the author: Zach Gollwitzer

Hey, I‘m Zach, the founder of The DIY Golfer! I created this site while playing D1 collegiate golf with a simple mission—I wanted to learn the golf swing and get better at golf myself.
Fast forward a few years, and my “journal“, The DIY Golfer, has been viewed by millions of golfers worldwide looking to do the same with their games. my mission is to make golfers more consistent in just a few hours a week through advanced practice strategies and timeless, first-principle golf instruction.