
Are you tired of those same old colors that golf clubs are paint-filled with? In this post, I will show you the basics of paint-filling golf clubs so that you can customize your set today! This is by far the cheapest DIY project on the site, and can be done by anyone!


Part 1- Remove the Existing Paint-Fill
Materials Needed
Liberally apply the paint remover to all areas of paint-fill on the golf club. Let soak for at least 2 hours. I let the club soak overnight.
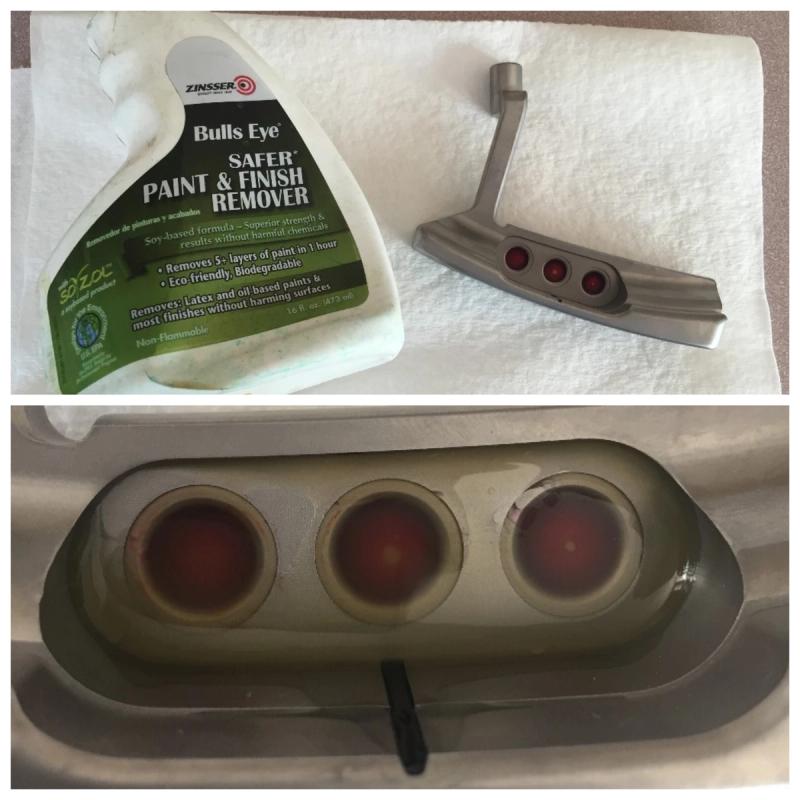
After the club has soaked for a sufficient amount of time, use a small nail, or something with a solid point at the end to scrape out any paint-fill that hasn't fallen out.

Part 2- Apply Paint-Fill
Materials Needed
- Tamiya Acrylic Paints- I use mainly the "clear" Tamiya colors except for white. The clear colors work for most putters, but I prefer solid colors for any putters that have a dark or black finish on them --Here is a useful color chart for Tamiya paints)
- Applicator Bottles
- Paper Towels
- Precision Q-Tips
- Acetone
There are a few methods to applying paint-fill. I have heard of people using paint pens or nail polish. I have tried both, but neither of these methods look professional, and are prone to chipping after several times of using the golf club. Tamiya paint is by far the best option for someone looking to achieve a professional, durable paint-fill.
Pour the paint into the needle tip applicator bottles, or if using a toothpick, you will be dipping it. Toothpicks work okay for the letters, but not so well for filling in larger areas.
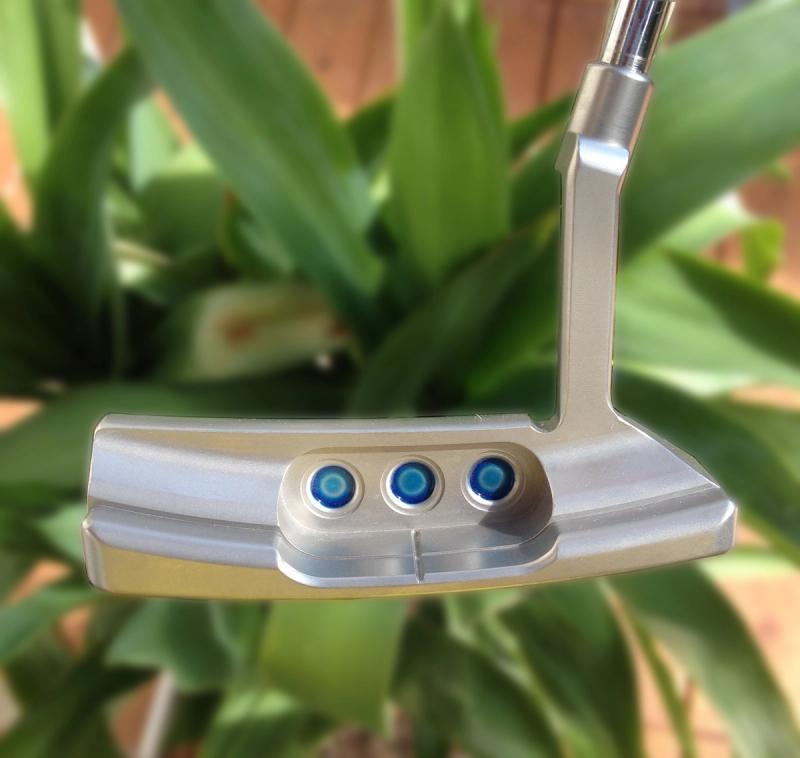
Paint-Filling Scotty Cameron "Cherry Dots"
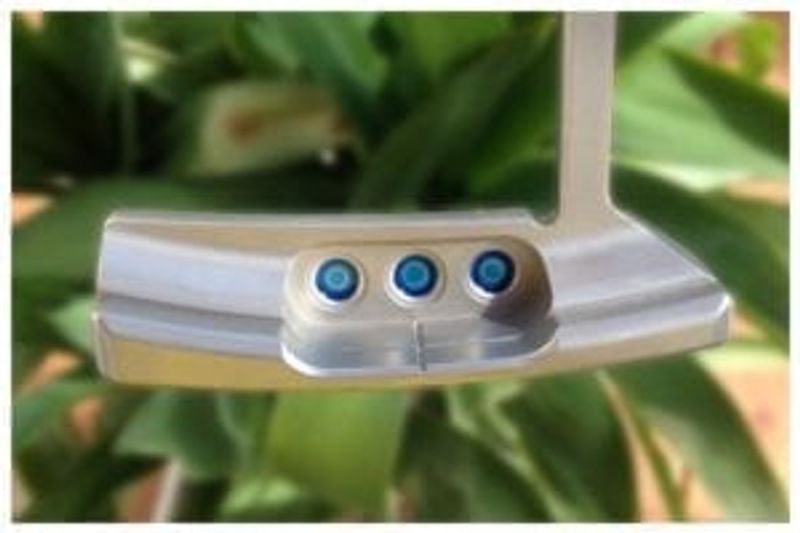
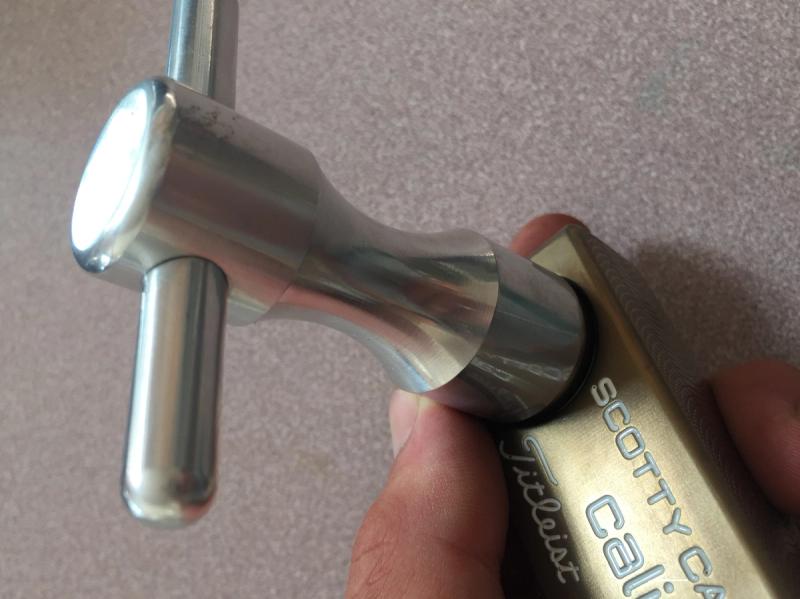
If you are paint-filling a Scotty Cameron putter like I am here, I recommend starting with the "cherry dots. If you have weights that can be paint-filled like I do here, remove them from the putter and paint fill them separately. This allows them to dry on a flat surface. Use the exact same technique that you did for the dots.
You will need a weight removal tool to do this.
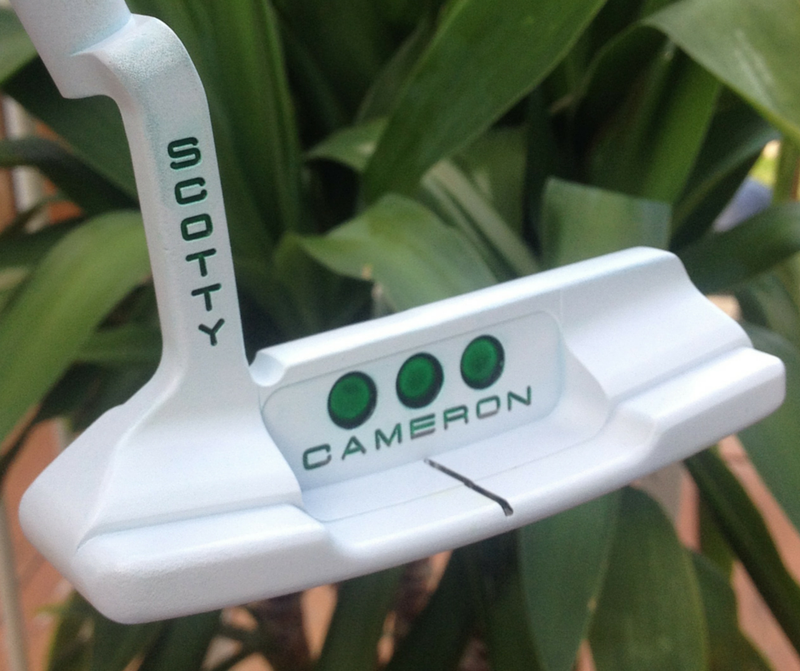
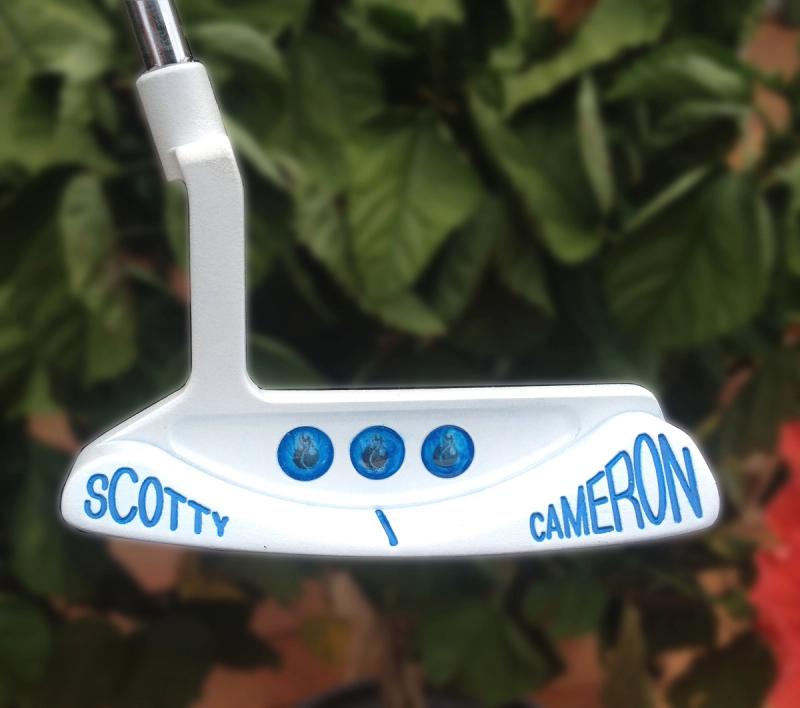
Now, you are ready to paint-fill the remaining areas of the putter/golf club. Try to stay between the lines, but do not worry about perfection in this step. We will clean everything up later.
Let the paint dry for at least 2 hours. If you want to speed up the process, use a hair-dryer. I personally will let the paint dry for at least 24 hours in most cases, because I find that it makes the cleanup process much easier.