Overall Verdict
I highly recommend this product.
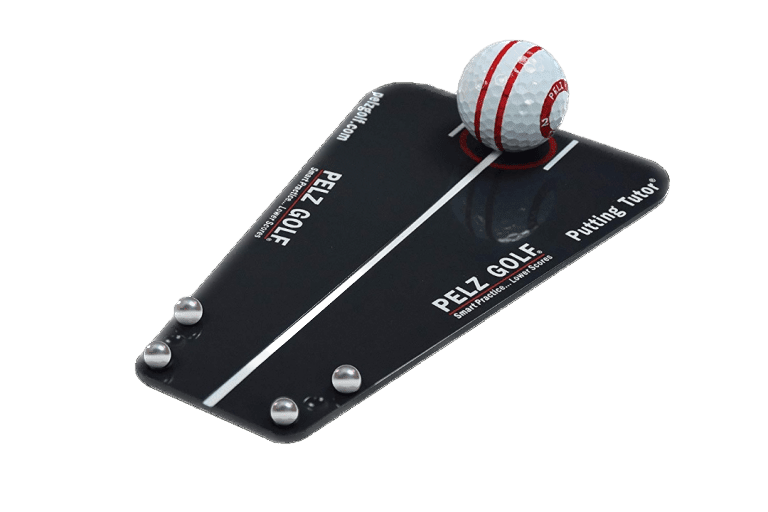
I love how much feedback this device gives. The marbles tell you whether you struck it well, the lines for eye alignment, and the straight edge for putter face alignment.
Product detailsMy Rating
Pros and Cons
Pros
- Easy to use
- Improves stroke and alignment
- Trusted by pros
Cons
- Easy to lose marbles
Best for
All GolfersThis product is best for all golfers who want to improve their game.
Product Features
My favorite feature
I love how much feedback this device gives. The marbles tell you whether you struck it well, the lines for eye alignment, and the straight edge for putter face alignment.
There are very few golf products out there which I can genuinely give a strong recommendation for.
This is one of them.
After watching the Phil Mickelson Secrets of the Short Game DVD years ago and seeing him use the Pelz Golf Putting Tutor, I had to buy one and try it.
And boy did it transform my game. As a D1 college golfer, this tool was an essential part of my bag and practice routine and still is!
Let's dive in and see how it can help YOUR game.
Pros and Cons
PROS:
- Easy to use
- Improves stroke and alignment
- Used by the pros
- Fits in bag
CONS:
- Easy to lose the marbles!
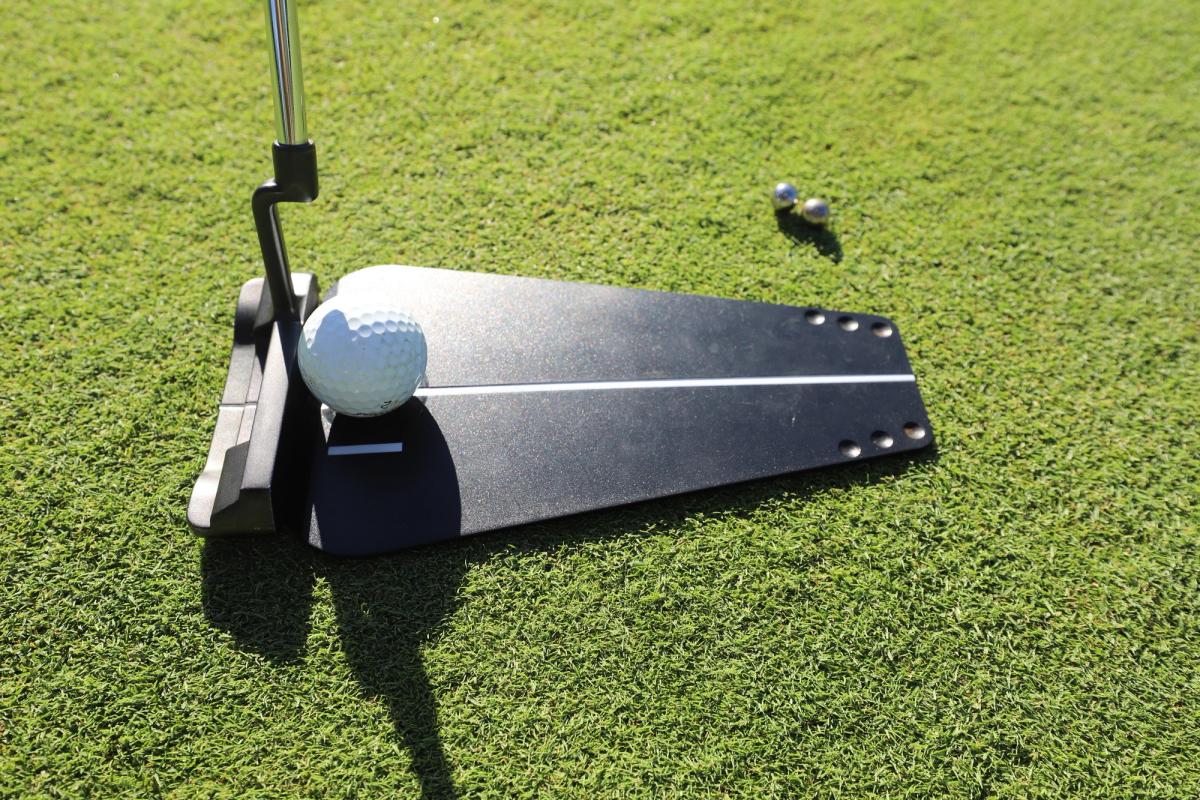
How the Pelz Putting Tutor Works
Using the Putting Tutor is simple.
- Aim the putting tutor on the green
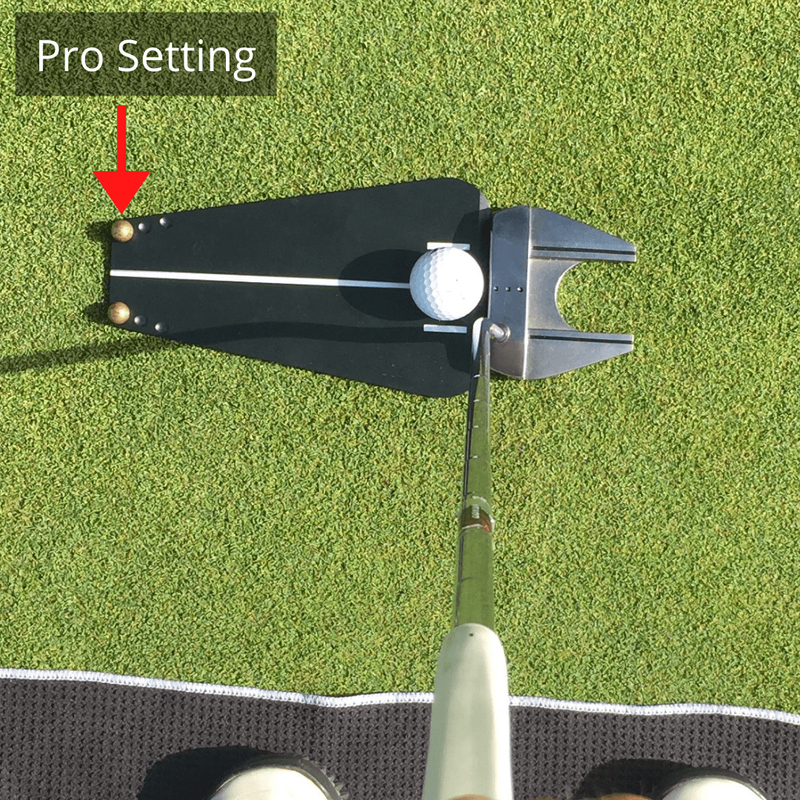
- Place the marbles on one of the 3 settings (I recommend working your way to the "pro" setting)
- Place a ball in the small indentation between the alignment lines
- Keep your head down and stroke a great putt!
- Adjust the alignment until you start making the putts
While the first few strokes will probably be frustrating and hit the marbles, you'll be stroking it pure every time in no time!
Do you need a putting aid?
For newer golfers, you might be wondering, "Why on earth would I spend my money to buy a training aid that helps with the most BORING part of my golf game?"
The simple answer is this: making just a few extra putts per round will drop your handicap faster than any other strategy.
When looking at various putting aids, my #1 objective is to find something simple. I want a tool that I can quickly set up and get good feedback from.
The Pelz Putting Tutor is super easy to use and checks all my boxes.
How does the Pelz Putting Tutor help your golf game?
So... Why you'd ever spend your money on a piece of plastic like this?
With just a few minutes of practice, 2-3x per week, this tool will transform your putting and make you both confident and consistent on the greens.
Improves your green reading skills and putting speed control
In his book, The Putting Bible, Dave Pelz did a study showing that 100% of amateur golfers are severely under reading their putts! I didn't believe this until I started using the Dave Pelz Putting Tutor.
The Pelz Putting Tutor will improve green reading because it ensures that you are starting the putt exactly where you are aimed. If you knock the two marbles off, you know that either your putter face was not square or you made a poor putting stroke and the ball started off line.
Better yet, since the amount of break is a function of speed, this will have the added benefit of teaching you proper speed control. You will quickly learn how much break to play when hitting firm, uphill putts and also help you nail those slippering downhill putts that you need to trickle in the hole. The video below demonstrates this concept.
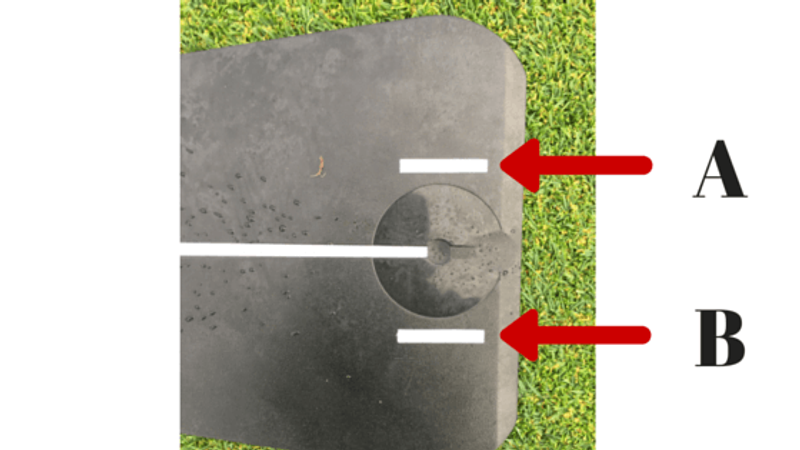
Improves your eye alignment and position
While the Pelz Putting Tutor does not include a mirror like the Eyeline Putting Aid it does still provide you a way to verify consistent eye position.
Why does this matter?
Because when you're putting, you want your eyes to be directly over or slightly inside the golf ball.
With the Pelz Putting Tutor, you will know if your eyes are centered because you should be able to see 100% of both white lines on the plate as pictured below. If the ball blocks either of those, that means your eyes are not centered over the golf ball.
Improves your putting strokes
While the Pelz Putting Tutor does nothing to guide your stroke, it requires you to hit a perfect starting line and strike squarely to get the ball through the two marbles.
Helps you square your putter face
The single most important part of putting is face alignment.
On a 3-foot straight putt, as long as the face impacts the ball square to the target, it doesn’t matter how bad your stroke is. If the face is square, the ball will go in.
How to use the Dave Pelz Putting Tutor
Step 1: Aim the Pelz Putting Tutor
To get you started, I suggest finding a straight putt of about 4-6 feet. This will allow you to get comfortable with the device.
Later on, you can move back to what I consider the "optimal" practice routine, which includes:
- 10-foot straight putts
- 10-foot, moderate left-to-right breaking putts
- 10-foot, moderate right-to-left breaking putts
Step 2: Square your putter face and eyes over the ball
Place the marbles on your desired setting, the ball in the designated indentation, and before you hit the putt, make sure that...
- You can see both of the white lines (ensures consistent eye position)
- Your putter face is flush with the straight edge of the putting tutor
Step 3: Put a great stroke on it, keep your head down
When hitting putts on this device, it's tempting to pull your head up to see if you made it through the marbles.
Instead, practice keeping your head down and stare at that dimple the ball was previously sitting on for at least 2 seconds after making contact.
Quick tips for using the Tutor
- In his videos, Dave Pelz recommends placing a tee in the ground where the Putting Tutor is aimed to train your eye position
- You will miss some putts even after making it through the marble gates. This is generally because you either hit it the wrong speed or hit a bump on the greens! Don't stress about this.
- When I putt with the Tutor, I focus on keeping my head down on all putts.
- Always start your practice with a straight, 5-10 foot putt. This will calibrate your brain to what a straight putt with a square putter face alignment looks like.
Who uses the Pelz Putting Tutor?
The most notable player on tour that uses the Putting Tutor is Phil Mickelson.
In addition, I have personally seen tons of collegiate golfers (including myself) using this aid.
It works for the best in the world and it will work for YOU.
What type of golfers would benefit from the Pelz Putting Tutor?
I think this aid is a must-have for golfers of all skill levels.
While it's not the most exciting part of the game to work on, improving your putting is a fast way to drop your handicap and I believe this is one of, if not the best way to do that.
What are some alternative putting aids to the Pelz Putting Tutor?
The closest alternative to the Putting Tutor is the Eyeline Training Aid, followed by a cheaper version called the GoSports Putting Alignment Set.
A less common alternative includes the Wellstroke Putting Mat, which I personally find a bit complicated, but achieves a similar result and could be great for some golfers!
Frequently Asked Questions
Who is Dave Pelz?
Dave Pelz is Phil Mickelson's short game coach and has authored several famous short game books including The Putting Bible and The Short Game Bible (both of which I've learned a ton from). Dave Pelz is well known for his background as a physicist who worked at NASA and later applied his analytical skills to study the game of golf (specifically, the short game).
What is the base made of?
The Pelz Putting Tutor is made of durable plastic and is pretty light!
Will this fit in my golf bag?
Absolutely! I keep this training aid in my bag at all times and use it before each round.
Does it come with a holding case?
Yes, it comes with a holding case for the putting tutor and the two marbles are stored in a small tube.
Does it come with instructions?
No, but hopefully this post will help you get started!
Does it come with that red-striped golf ball?
No, that ball is another Dave Pelz product called the O-Ball, which is purchased separately and is a great complement to the Putting Tutor.
What are the dimensions of the plate?
The plate is 1/4" thick, 5" wide, and 8 3/4" long. It will easily fit in the large pocket of your golf bag.
What is a putting plate?
A "putting plate" is a general category of putting training aids where you place a plate on the green and get immediate feedback on your eye alignment and putting stroke.
Does it have a mirror for eye position?
No, if you are looking for a putting aid with a mirror, the Eyeline Putting Aid is your best bet.
Why is there a groove in the putting tutor?
The groove is helpful for getting the ball on the plate without having to pick it up with your hand.