Want to advertise here?

Get your brand in front of 30k golfers every month

click for more info
Golf club refinishing

How to Remove the Nicks and Dings from a Golf Club (and polish)

Last updated Jun 02, 2023

How to Remove the Nicks and Dings from a Golf Club (and polish) featured image
Headshot of Zach Gollwitzer

Written by Zach

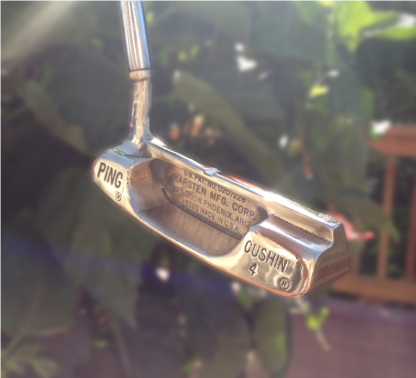
In the world of refinishing, this is by far the most important preliminary step.  After years of use, golf clubs will get beat up, and in order to make them appear "new," it is important to remove these signs of use.  When I first began learning how to refinish golf clubs, it took me a while to learn how to do this.  There aren't many tutorials out there specific to the technique that is shown in the video below.  Anyways, this is the first step in ANY refinishing process.

The second half of the video walks you through the polishing process, which is commonly used for refinishing vintage putters.

Before Starting This Tutorial, Your Club Must

Materials Needed

  • For removing nicks and dings
    • Protective Gloves (preferably not baggy ones like I'm unfortunately using in the video) and Eye-wear
    • 6" Bench Grinder/Buffer with 1/2" arbor holes (the cheapest and most readily available deburring and polishing wheels fit are 6" in diameter with 1/2" arbor holes)
      • There is a difference between a "bench grinder" and a "bench buffer".  A bench grinder is generally used for grinding/sharpening metals, and thus, has guards on it.  If you buy one of these, you may consider removing the guards (at your own risk).  A bench buffer is for polishing wheels and is not as protective.  Most bench buffers will be able to handle a deburring wheel, but they are not made for it.
      • The ideal setup would be using the bench grinder for the deburring wheel, and the bench buffer for the polishing wheels, but is obviously a more costly setup.
    • 6" x 1/4" x 1/2" fine deburring wheel (You might have to look around for this one.  These aren't very common)
    • 6" x 1/2" x 1/2" fine deburring wheel
  • For polishing
    • Sisal wheel - This is going to do the bulk of your polishing and should be used with the black polishing compound (you can also use brown and white compounds if you are patient enough)
    • Polishing wheels  - For final touches.  Use with finer polishing compounds (i.e. red, green, blue)
    • Wheel set (if you don't want to buy separately)
    • Polishing compounds

Note: when finding a bench grinder, the size of the grinder doesn't matter.  A 6" or 8" grinder will work, but be sure to match the wheel sizes to the grinder size!  I recommend purchasing the bench grinder first, and then purchasing the wheels that will fit it.  Yes, the materials are expensive, but all the materials listed above will last a long time.  I have been using the same bench grinder and wheels for three years now, and expect to use them (wheels) for another year at least!

You might also like

Other posts for category: Golf club refinishing

  • Basic Refinishing Techniques cover image
    Golf club refinishing
    Basic Refinishing Techniques

    Thinking about a new hobby? Golf club refinishing is an excellent way to pass the time and even make a few bucks while you're at it.

  • Basic Satin Finish cover image
    Golf club refinishing
    Basic Satin Finish

    Here is a basic way to refinish any putter that looks great every time!

  • How to do a Black Oxide Finish on a Carbon Steel Putter cover image
    Golf club refinishing
    How to do a Black Oxide Finish on a Carbon Steel Putter

    One of the best looking refinishes that you can do is the classic black oxide finish. In this tutorial, I will show you how to do this simple finish.

  • How to do a "Fade" Paint-fill on a Scotty Cameron Putter cover image
    Golf club refinishing
    How to do a "Fade" Paint-fill on a Scotty Cameron Putter

    One of the best looking methods for paint-filling the "cherry dots" of a Scotty Cameron is the fade method.  It is rather simple, and looks amazing when finished!

  • How to do a "Logo" Paint-Fill on a Scotty Cameron Putter cover image
    Golf club refinishing
    How to do a "Logo" Paint-Fill on a Scotty Cameron Putter

    The logo paintfill is one of my favorites because it allows you to add any custom design to the Cherry Dots of a Scotty Cameron putter!

  • How to do a Polymer Finish cover image
    Golf club refinishing
    How to do a Polymer Finish

    This is one of the more advanced refinishing techniques because it requires you to apply an ultra hard layer of polymer resin to your putter. If you're looking for a durable way to protect your putter from rust and make it look beautiful at the same time, this is your perfect finish!

About me

Zach Gollwitzer
Zach Gollwitzer

Hey, I‘m Zach, the founder of The DIY Golfer! I created this site while playing D1 collegiate golf with a simple mission—I wanted to learn the golf swing and get better at golf myself.

Fast forward a few years, and my “journal“, The DIY Golfer, has been viewed by millions of golfers worldwide looking to do the same with their games. my mission is to make golfers more consistent in just a few hours a week through advanced practice strategies and timeless, first-principle golf instruction.